
Upcycling household items is a fantastic way to save money and reduce waste while sparking creativity in children. Learning how to make a Pringles can toy provides endless entertainment through simple DIY crafts that transform humble snack containers into imaginative tools for play.
Have you ever looked at an empty snack container and wondered what it could become? In 2026, we are all looking for smarter ways to reduce waste and keep our little ones busy without spending a fortune at the toy store. Learning how to make a Pringles can toy is one of the best ways to blend sustainability with playtime. It is simple, fun, and creates memories that last much longer than the chips themselves.
When you sit down to build something from scratch, you teach your children that they do not need to buy every plastic gadget they see in an advertisement. Instead, they can look at the world differently. A piece of cardboard becomes a castle. A tube becomes a telescope. By mastering how to make a Pringles can toy, you are opening a door to infinite possibilities. Let us get into the craft room and start building something wonderful today.
Key Takeaways
- Sustainability: Upcycling snack containers keeps waste out of landfills and promotes an eco-friendly mindset.
- Cost-Effective: You can create professional-grade play experiences using common items found around your home.
- Developmental Benefits: These DIY projects help improve fine motor skills, logical thinking, and creative problem-solving.
- Versatility: A single container can be turned into anything from a drum set to a marble run or a puppet theater.
- Customization: Each project is a blank canvas that children can decorate to reflect their unique personality and interests.
Choosing Your First Project
Before you dive into your crafting stash, you need to decide what kind of toy you want to create. Not every snack container is destined for the same path. Some are tall and sturdy, while others might be slightly crushed. Evaluate what you have on hand and match it to your child’s interests.
The Classic Drum Set
If you want to know how to make a Pringles can toy that makes noise, look no further than the DIY drum. This is perhaps the easiest project for a beginner. The shape of the container acts as a perfect resonator for sound. All you need is the container itself, some construction paper, and maybe some markers for decoration.
To start, make sure the interior is clean and dry. Wrap the outside in colorful paper. You can even use duct tape or electrical tape to secure the rim. If you have two containers, you can create a drum set with different pitches. Use wooden spoons or chopsticks as drumsticks. It is a loud, joyful way to spend an afternoon.
The DIY Marble Run
If your children love watching things roll, a marble run is the perfect choice. When you learn how to make a Pringles can toy like a marble run, you are essentially building an engineering challenge. Cut the containers into spirals or sections to create a track. You can stack them horizontally or vertically.
Glue the sections to a large piece of flat cardboard. Use tape to reinforce the joints where the tracks connect. The goal is to see if your marble can travel from the top to the bottom without falling off. It teaches gravity, momentum, and patience in a way that feels like a game.
Preparing Your Materials for Success
Success starts with preparation. Before you glue or paint, you need to make sure your containers are ready for action. Learning how to make a Pringles can toy requires a few basic supplies that you likely already have tucked away in your junk drawer.
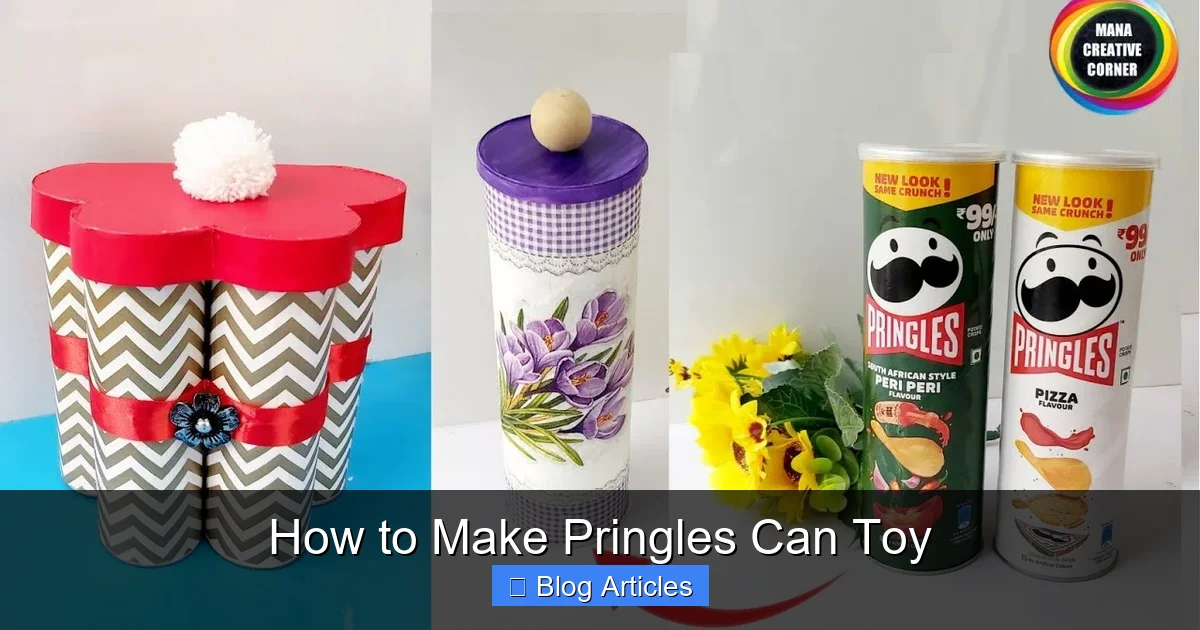
Visual guide about How to Make Pringles Can Toy
Image source: i.ytimg.com
Cleaning and Drying
Never skip the cleaning process. If there are crumbs or grease left inside, your tape will not stick, and your paint will flake off. Wash the inside with warm, soapy water. Use a bottle brush if necessary. Then, let it air dry completely for at least twenty-four hours.
Safety First
When you are figuring out how to make a Pringles can toy, safety is the number one priority. You will be using scissors or a craft knife to cut through the stiff cardboard. If you are doing this project with a toddler, you should handle the cutting portion yourself. Keep the workspace clear and ensure your children understand that they should not use sharp tools unsupervised.
Use non-toxic glue and paints whenever possible. If you decide to paint the container, use acrylic craft paint. It adheres well to the coated cardboard surface of the snack tin. If you find the paint is slipping, a light sanding with fine-grit sandpaper can help the surface “grab” the paint better.
Creative Ways to Decorate Your Creations
The best part of learning how to make a Pringles can toy is the design phase. This is where your child’s personality truly shines. There is no right or wrong way to make it look, but there are some tips to make it last longer.
The Power of Decoupage
Decoupage is a fancy word for gluing paper to a surface, but it is one of the strongest methods for decorating these containers. Find old magazines, comic books, or wrapping paper. Cut them into small pieces and use a mixture of white glue and water to paste them onto the container.
Once dry, add a final coat of the glue mixture over the top. This creates a hard, protective shell. Your toy will not only look professional, but it will also be much more durable during rough play. It is a great way to recycle old paper scraps while you learn how to make a Pringles can toy.
Adding Texture and Flair
Do not be afraid of texture. You can add buttons, felt scraps, or even dried pasta to the exterior of your toy. If you are building a robot, use the metal bottom as the face. If you are building a treasure chest, use brown fabric to make it look like leather.
Consider the intended use of your how to make a Pringles can toy guide. If it is meant to be a storage box, you might want a hinge on the lid. If it is meant to be a puppet theater, you might want to cut a large square out of the side. Be creative and adapt the project to your vision.
Educational Benefits of DIY Toys
Beyond the fun, there is deep learning happening here. Parents often ask me why I spend so much time teaching people how to make a Pringles can toy. The answer is simple: it encourages a growth mindset. When children build their own toys, they learn to value the process over the product.
Problem Solving and Engineering
When a piece of cardboard does not fit quite right, a child has to stop and think. How can I make this work? Maybe I need more tape. Maybe I need to move the anchor point. This is the foundation of STEM education. Every step in the process of how to make a Pringles can toy is a small lesson in physics and logic.
Building Fine Motor Skills
Cutting, gluing, and painting are complex tasks for small hands. By mastering these tasks, children develop the fine motor skills they need for writing, drawing, and daily tasks. It is a workout for their muscles and their brains. Helping your child figure out how to make a Pringles can toy is an investment in their development.
Scaling Your Projects for Different Ages
The beauty of this craft is that it grows with the child. You can start with something very simple for a toddler and move to more complex structures as they get older.
Toddler-Friendly Ideas
For toddlers, stick to sensory experiences. Fill the container with beads or rice to make a shaker instrument. Seal the lid with heavy-duty tape so it cannot be opened. This allows them to explore sound and rhythm without the mess of small parts. Teaching a toddler how to make a Pringles can toy as a “noise maker” is a perfect entry point.
School-Age Challenges
For older kids, introduce complexity. Challenge them to build a rocket ship with fins or a functional flashlight using the container as the housing. Let them use a soldering iron or advanced craft materials under your guidance. When they understand how to make a Pringles can toy with moving parts or electronic components, they feel a huge sense of accomplishment.
Conclusion
By now, you should have plenty of inspiration for your next rainy afternoon. Learning how to make a Pringles can toy is about more than just a snack container. It is about fostering a culture of creativity, resourcefulness, and intentional play within your home. Whether you are building a simple drum or a complex marble run, the time you spend together is the most valuable part of the project.
So, clear off your kitchen table, gather your supplies, and start digging through your recycling bin. The next great toy is waiting to be built. You do not need expensive materials or a fancy workshop. You just need a little curiosity and a willingness to try. Now that you know how to make a Pringles can toy, what will you create first?
Frequently Asked Questions
Is it safe to use these containers for food after turning them into toys?
No, once you have used glue, paint, or other craft materials on the container, it should no longer be used for food storage. Please dedicate these containers strictly to craft and play projects to ensure safety.
What is the best type of adhesive for this craft?
For most projects, a hot glue gun works best for quick, strong bonds, though it should be used by adults. For children, white school glue or double-sided tape are excellent, safe alternatives that hold well.
How do I keep the lids from popping off during play?
You can use a small piece of decorative duct tape or washi tape to create a hinge or a seal around the rim. This keeps the lid securely in place while still allowing you to access the inside if needed.
Can I paint over the plastic-coated cardboard easily?
Yes, but you should use acrylic craft paint for the best coverage and durability. If the paint seems to slide off, try a light sanding with fine-grit sandpaper to give the surface some texture.
How many containers do I need for a marble run?
A simple track can be made with just two or three containers, but a larger, multi-level run might require five to ten. Start small and add more as your child gets comfortable with the design process.
Are these toys durable enough for long-term use?
They are surprisingly sturdy, especially if you reinforce the outside with layers of glue or decoupage paper. While they aren’t meant to last forever, they can provide weeks or months of fun with proper care.