
Keeping your children’s wooden toys clean is essential for both hygiene and longevity. By using gentle, natural methods, you can effectively sanitize your Melissa and Doug toys without damaging the wood or the non-toxic finishes. Follow this simple guide to ensure your playthings remain safe and beautiful for years to come.
If you are a parent or caregiver in 2026, you likely have a collection of classic wooden playthings scattered across your living room floor. Melissa and Doug wooden toys are beloved staples in homes everywhere because they are durable, beautiful, and encourage imaginative play. However, as much as our little ones love to play, they also have a knack for getting these toys sticky, dusty, or covered in mystery crumbs. Knowing how to clean Melissa and Doug wooden toys is a vital skill for every caregiver.
Many people worry that they might ruin the smooth paint or the structural integrity of the wood if they use the wrong cleaning method. The good news is that these toys are built to last, and cleaning them does not require expensive supplies or a chemistry degree. With just a few simple household staples and a little bit of patience, you can get your child’s favorite puzzles, kitchens, and building blocks looking as fresh as the day you brought them home.
Key Takeaways
- Avoid Soaking: Never submerge wooden toys in water, as this causes the wood to swell, crack, or warp over time.
- Use Gentle Solutions: Stick to mild dish soap or a diluted white vinegar solution to sanitize surfaces safely.
- Prioritize Drying: Always allow wooden toys to air dry completely in a well-ventilated area before putting them back in the toy box.
- Spot Clean First: Before doing a deep clean, try to remove surface dust or light marks with a slightly damp cloth.
- Check for Damage: Regular cleaning is the perfect time to inspect toys for splinters, loose parts, or fading paint.
- Keep it Natural: Avoid harsh chemicals like bleach or strong disinfectant wipes, which can ruin the finish of high-quality wooden toys.
The Golden Rules of Cleaning Wooden Toys
Before you start scrubbing, it is important to understand how wood reacts to moisture. Unlike plastic toys, which can be thrown into the dishwasher or submerged in a tub of soapy water, wood is a porous, living material. When wood absorbs too much water, it expands. When it dries out again, it shrinks. This cycle is what leads to those pesky cracks, warped puzzle boards, and peeling paint that we all want to avoid.
Why Less Is Always More
When you decide it is time to refresh your wooden collection, remember that moisture is the enemy. You want to use the dampest cloth possible—not a soaking wet one. If you can wring water out of your cloth, it is too wet. Think of cleaning as a “wipe down” rather than a “wash down.” By keeping the moisture limited to the surface, you preserve the internal structure of the wood and ensure the beautiful non-toxic paints stay vibrant and intact.
Choosing Your Cleaning Supplies
You do not need industrial-strength cleaners to get these toys sanitized. In fact, harsh chemicals can be harmful to children if they end up mouthing the toys later. For most cleaning tasks, a mixture of warm water and a tiny drop of mild, eco-friendly dish soap is perfectly sufficient. If you are dealing with a “germy” situation—perhaps after a playdate or a bout of the sniffles—a solution of half white vinegar and half water is an excellent natural disinfectant that kills most household bacteria without any toxic residue.
Step-by-Step Guide to Daily Maintenance
Daily maintenance is the secret to avoiding deep-cleaning sessions later on. Making cleaning a quick habit keeps the grime from building up in the corners of wooden kitchens or the crevices of building blocks.
Wiping Down Surfaces
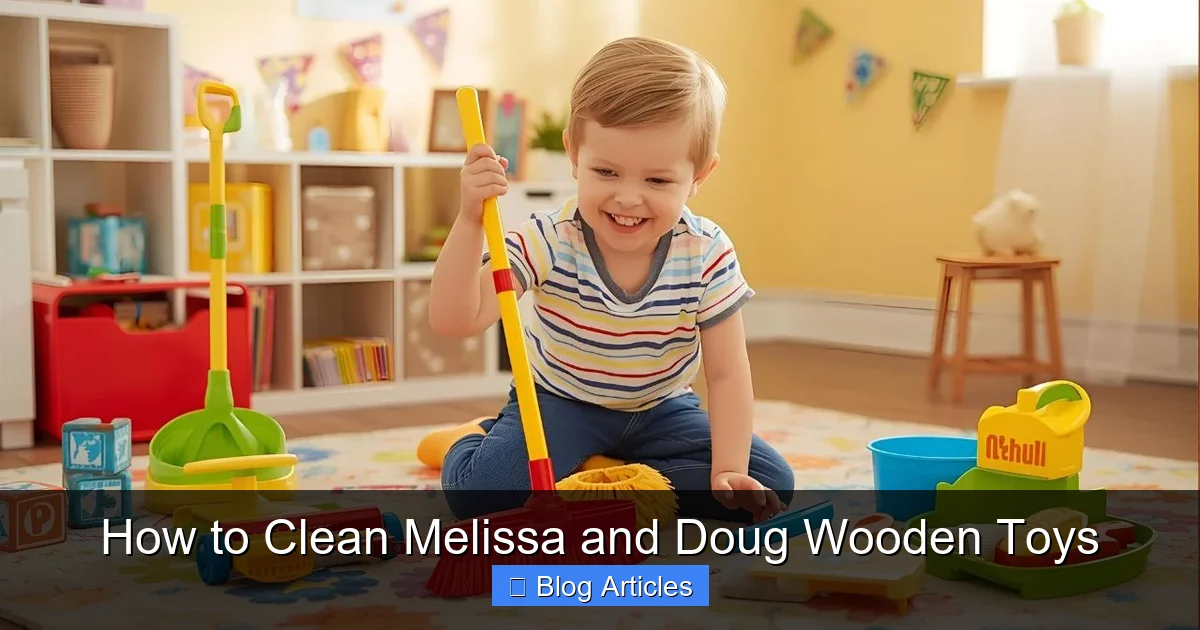
Grab a soft microfiber cloth and dampen it slightly with your vinegar-water solution. Start by wiping the exterior surfaces of the toys. If you are cleaning a complex item like a wooden play kitchen or a train set, focus on the high-touch areas first, such as knobs, handles, and countertops. This quick wipe-down removes surface oils and dust that accumulate throughout the day.
Handling Sticky Spills
Toddlers are professionals at leaving sticky residue on their toys. If you find a patch of dried juice or food, do not be tempted to scrub it with a scouring pad. Metal or abrasive sponges will scratch the wood finish. Instead, hold a damp cloth over the sticky spot for about thirty seconds. This softens the residue so it can be wiped away gently. If the spot is stubborn, a tiny dab of a mixture of baking soda and water can act as a gentle abrasive to lift the stain without damaging the paint underneath.
Deep Cleaning for Heavily Used Toys
Sometimes, a simple wipe-down isn’t enough, especially if a toy has been left outside or has seen better days. Deep cleaning requires a bit more focus, but it is still quite manageable.
Sanitizing After Sickness
If your household has been dealing with a cold or flu, you may feel the need to sanitize everything. While vinegar is a great natural cleaner, if you feel you need a stronger solution, you can use an alcohol-based wipe, but use it with caution. Gently wipe the wood surface and immediately follow it with a clean, dry cloth. Do not let the alcohol sit on the wood for long, as it can strip away the protective finish over time. Always test a tiny, inconspicuous spot on the bottom of the toy first to ensure the finish remains clear.
Deep Cleaning Complex Items
Larger Melissa and Doug items, like their wooden play sets, often have many small parts. Take the time to disassemble any loose pieces. Wipe the base and the individual components separately. Using a cotton swab is a fantastic trick for those hard-to-reach nooks where dust likes to hide. This level of detail ensures that your toys are truly clean from top to bottom.
The Drying Process: Why It Matters
The final step of cleaning—drying—is actually the most important. If you leave a toy damp, you risk mold growth or warping. Never, under any circumstances, should you place your wooden toys directly on a heater or in a microwave to speed up the drying process. These extreme heat sources will almost certainly crack the wood.
Best Practices for Air Drying
After cleaning, lay all your wooden pieces out on a dry, clean towel in a well-ventilated area. If you can, place them near a window where they can catch a bit of fresh air and indirect sunlight. Sunlight is a natural and effective way to help kill bacteria and dry the pieces thoroughly. Make sure the toys are spaced out so air can circulate around every side. Give them at least a few hours to dry completely. If you are unsure, wait overnight before putting them back into their bins.
Restoring and Protecting Your Toys
Over the years, wooden toys can look a bit dull. While Melissa and Doug toys are made with high-quality finishes, natural wear and tear are inevitable. Fortunately, there are ways to give them a little facelift.
Natural Conditioning
If the wood begins to look dry or loses its luster, you can apply a tiny amount of food-grade mineral oil or beeswax. Use a soft, lint-free cloth to rub a very thin layer onto the wooden surfaces. This acts like a moisturizer for the wood, sealing it and bringing back that original shine. Just remember to wipe off any excess oil thoroughly so the toy doesn’t feel greasy during the next play session.
When to Retire a Toy
Cleaning is the best time to inspect your collection. If you notice deep splintering or significant structural damage that might pose a choking hazard or injury risk, it might be time to retire that specific piece. While we love to keep toys forever, safety must always come first. If you spot only minor paint chips, however, don’t worry—these are just signs of a well-loved childhood, and they add character to your wooden collection.
Conclusion
Cleaning your Melissa and Doug wooden toys doesn’t have to be a chore. With a consistent, gentle approach, you can maintain the beauty and safety of these classic playthings for years. By avoiding excessive moisture, choosing mild cleaning agents, and ensuring a thorough drying process, you ensure that these toys remain a healthy part of your child’s development. Remember, a little bit of care goes a long way. When you take the time to clean these toys, you are preserving the memories of hours of creative play that occurred on your living room floor. Keep these tips in mind, stay consistent, and enjoy the peace of mind that comes with a clean and happy playroom.
Frequently Asked Questions
Can I put wooden toys in the dishwasher?
No, you should never put wooden toys in the dishwasher. The intense heat and prolonged exposure to water will cause the wood to warp, crack, and potentially ruin the non-toxic paint.
How often should I clean my child’s toys?
A light wipe-down once a week is usually sufficient for regular maintenance. However, you should deep clean them immediately after a playdate or if a child in the house has been sick.
What if the wooden toy gets mold on it?
If you discover mold, it is safest to discard the toy. Mold can penetrate the porous wood fibers, making it extremely difficult to fully remove and potentially harmful to your child’s health.
Can I use bleach to disinfect wooden toys?
It is best to avoid bleach, as it is too harsh for wood and can damage the finish or leave behind toxic residue. Stick to diluted vinegar or mild soap for safer cleaning.
How do I remove crayon marks from wooden toys?
You can often remove crayon marks by gently rubbing them with a soft cloth dipped in a tiny amount of baking soda and water paste. Always test on an inconspicuous spot first to ensure the finish stays intact.
Why is my wooden toy peeling?
Peeling is usually caused by excessive exposure to water or high humidity, which makes the wood swell and the paint lift. Keeping your wooden toys dry and storing them in a cool, low-humidity environment helps prevent this.