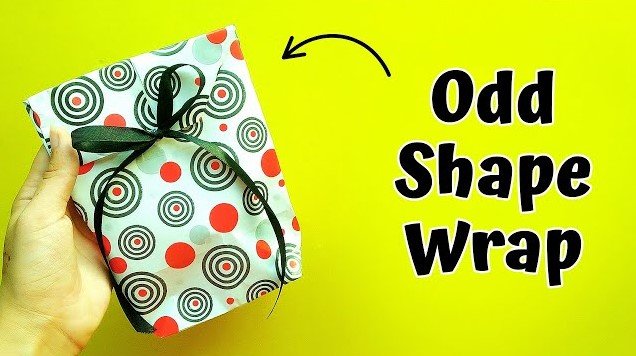
Wrapping oddly shaped toys doesn’t have to be a stressful holiday chore. By using smart techniques like fabric pouches, custom boxes, and decorative accents, you can turn any lumpy gift into a beautifully presented surprise that your loved ones will adore.
The holiday season or a birthday morning is fast approaching. You have found the perfect gift, but there is just one problem: it looks like an absolute nightmare to wrap. Whether it is a giant stuffed bear, a bicycle helmet, or a set of oddly shaped building blocks, we have all faced the dreaded gift-wrap challenge.
In 2026, the art of gift-giving is more about the experience than ever before, and a beautifully presented gift sets the tone for the excitement to come. Learning how to wrap odd shaped toys is a skill that will save you hours of frustration.
You do not need to be a professional decorator or spend a fortune on fancy supplies to achieve a polished look. With a few simple tricks and some patience, you can transform even the clumsiest-looking toy into a centerpiece under the tree. Let us dive into the best methods to make your gift-giving look effortless and elegant.
Key Takeaways
- Use the Box Trick: When in doubt, place the item in a box first to create a uniform surface that is much easier to wrap.
- Embrace Fabric Wrapping: Furoshiki, the Japanese art of fabric wrapping, is the perfect solution for toys with curves or protruding parts.
- Create Custom Pouches: If you don’t have a box, use decorative paper bags or fabric to create a “party popper” style wrap.
- Strategic Padding: Use crumpled tissue paper or bubble wrap to fill in gaps and smooth out the exterior of your gift.
- Focus on Embellishments: Use bows, ribbons, and toppers to draw attention away from corners or awkward folds.
- The “Envelope” Method: Learn how to fold paper into an envelope to contain small or flat odd-shaped items perfectly.
The Golden Rule: The Box Is Your Best Friend
If you ask any professional gift wrapper about their secret, they will tell you the same thing: find a box. While it might seem like cheating, placing an odd-shaped toy into a box turns a chaotic geometry problem into a simple square or rectangular surface. This is the ultimate starting point for beginners who want to learn how to wrap odd shaped toys without the stress.
Finding or Creating the Right Size
Keep a stash of shipping boxes throughout the year. If you do not have one that fits perfectly, you can easily resize a larger box. Simply cut the corners down, fold the sides inward to fit the toy snugly, and tape them securely. If the toy is fragile, use extra tissue paper to ensure it does not rattle around inside the container.
Filling the Void
Sometimes the toy fits, but it leaves large gaps. This is where your secret weapon comes in: filler material. You can use shredded paper, newspaper, or bubble wrap. By creating a solid block inside the box, you prevent the paper from tearing when you try to pull it taut across the edges. A solid box provides a stable foundation that makes the rest of the wrapping process smooth and easy.
Mastering the Furoshiki Method
In 2026, sustainable living is more important than ever. The Japanese art of Furoshiki using fabric to wrap gifts is not only eco-friendly but also the best way to handle toys that simply cannot be boxed. Fabric is forgiving, stretchy, and beautiful. It conforms to any shape, whether it is a round ball or a jagged action figure.
Visual guide about How to Wrap Odd Shaped Toys
Image source: i.pinimg.com
Choosing the Right Fabric
You can use scarves, bandanas, or scraps of festive cloth. Look for materials that have a bit of drape. Silk, cotton, or jersey knits work exceptionally well. You do not even need to cut the fabric perfectly; the organic edges often add to the charm of the finished gift.
The Basic Knot Technique
Place your toy in the center of a square piece of fabric. Pull two opposite corners together and tie them in a double knot. Then, pull the remaining two corners up and tie them over the first knot. You can tuck in the loose ends or leave them flowing for a rustic look. This technique takes seconds and makes your odd shaped toy look like a high-end boutique purchase.
Using Paper Bags for an Easy Fix
When you are in a rush and realize you cannot wrap that oddly shaped robot, look no further than your kitchen pantry or a local craft shop. Paper bags are the unsung heroes of the gift-wrapping world. They are sturdy, opaque, and come in various sizes, making them perfect for toys that defy traditional square corners.
The Decorative Bag Method
Place the toy inside a plain paper bag. If the toy is too tall, trim the top of the bag with decorative scissors to create a scalloped edge. Fold the top of the bag down and use a festive clip or a hole punch with ribbon to close it. You can draw on the bag, use stickers, or stamp designs to make it feel special.
Creating a “Cracker” Style Wrap
If you have an object that is long and thin, like a toy sword or a doll, wrap the item in paper first to secure it. Then, gather the paper at both ends and tie them with ribbon, just like a Christmas cracker. This hides the irregular shape entirely and adds a playful element to the reveal.
When in Doubt, Use Padding and Layers
Sometimes the problem is not the shape, but the sharp edges of a toy that keep tearing through your beautiful wrapping paper. If you try to wrap a plastic building set with thin paper, the corners will poke through in seconds. The trick to wrapping these items is to create a buffer zone.
The Tissue Paper Barrier
Before using your decorative outer paper, wrap the toy in several layers of tissue paper. This adds a soft, rounded layer that protects the outer paper from punctures. If the toy has very sharp parts, consider wrapping it in a layer of bubble wrap first for extra safety.
Double-Layer Wrapping
If you want a professional look, try double-layering. Use a plain kraft paper as your base layer to smooth out the shape, and then wrap a second layer of patterned or shiny paper over the top. This extra thickness makes the package look substantial and helps hide any bumps or irregularities underneath the surface.
Creative Ways to Distract the Eye
If your wrapping job still looks a bit lumpy, do not worry. You can use optical illusions and accessories to distract the eye. Professional decorators know that a well-placed bow is a powerful tool. When you learn how to wrap odd shaped toys, you realize that the presentation is 50 percent structure and 50 percent decoration.
The Power of Toppers
Place a large, fluffy bow right over the most awkward bump or lumpy section of the gift. Alternatively, use greenery, small ornaments, or personalized tags to draw the eye toward the center of the package. A busy, well-decorated top will hide almost any mistake you made with the paper underneath.
Creating “Fake” Geometry
Use wide ribbon to wrap around the package in a crisscross pattern. Pull the ribbon tight at the corners of the toy. This tension helps to compress the wrapping paper against the item, creating a cleaner silhouette. By using thicker ribbon, you can also add structure to a soft, squishy gift like a stuffed animal.
Sustainable Wrapping Alternatives for 2026
As we move through 2026, more people are choosing sustainable options for their gifts. Wrapping odd shaped toys is a great time to experiment with upcycling. Instead of buying new rolls of paper, look at what you already have in your home.
Upcycled Materials
Old maps, newspapers, and even children’s drawings make fantastic, unique wrapping paper. If you have a toy that is difficult to wrap, these materials are often easier to fold and manipulate than standard store-bought rolls. They also show the recipient that you put extra thought and care into the process.
The Reusable Pouch Approach
If you have kids, consider sewing or buying simple drawstring pouches. These can be used year after year. They are the perfect solution for odd shaped toys because they expand to fit whatever is inside. Simply drop the toy in, pull the string, and add a tag. It is the fastest, most eco-friendly way to handle those “impossible to wrap” items.
Conclusion
Wrapping odd shaped toys does not have to be a source of holiday stress. By using boxes, trying the Furoshiki method, utilizing paper bags, or simply using strategic padding, you can handle any gift with confidence. Remember that the goal is not perfection it is the delight of the person receiving the gift.
A bit of creativity and a well-placed bow can turn even the most awkward package into a beautiful, memorable part of the celebration. So, gather your supplies, take a deep breath, and enjoy the process of making your gifts look just as exciting on the outside as they are on the inside.
Frequently Asked Questions
What is the easiest way to wrap a round or sphere-shaped toy?
The easiest way is to use the “bag” or “pouch” method. Place the toy in the center of a square piece of paper or fabric, pull all sides up to the top, and tie them together with a ribbon to create a bundle.
How can I stop corners from tearing through the paper?
Prevent tearing by wrapping the sharp edges in tissue paper or bubble wrap first. This creates a soft buffer that keeps your outer decorative paper smooth and intact.
Is it okay to use multiple boxes to wrap one toy?
Yes, absolutely! You can cut boxes to fit specific parts of a toy or combine small boxes with tape to create a custom-shaped container that fits the item perfectly.
What if I don’t have enough wrapping paper for a large odd-shaped gift?
Try the diagonal wrapping technique, where you place the item at an angle on the paper. Alternatively, use two pieces of paper and overlap them, hiding the seam with a long, wide ribbon or decorative trim.
Can I wrap a toy without using any tape?
Yes, the Furoshiki fabric wrapping method is designed to be tied with knots rather than taped. This is a great, eco-friendly way to wrap gifts without needing any adhesives.
How do I make a lumpy gift look more professional?
Focus on your accessories. Use a thick, wired ribbon to add structure and finish with a large, high-quality bow or a sprig of greenery to draw attention away from the underlying shape.