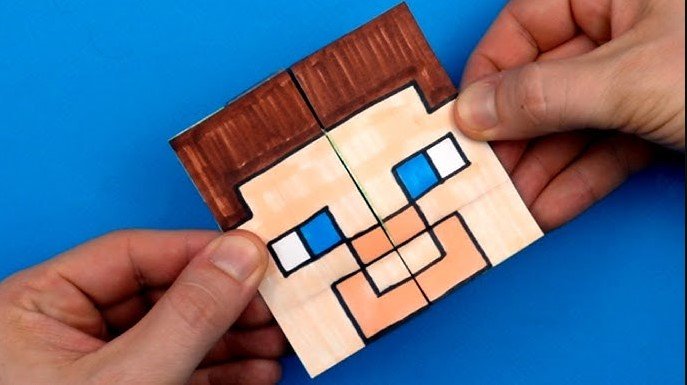
Building your own Minecraft toys is a fantastic way to bring your favorite blocky world into reality. This guide covers simple, creative DIY methods using common household items to build everything from swords to mobs. Whether you are a beginner or a pro crafter, these projects offer endless fun for every Minecraft fan.
Do you ever look at your computer screen and wish you could reach in and grab a Creeper or a Diamond Sword? By 2026, the world of Minecraft has only grown larger, but the joy of holding a physical block remains unmatched. Learning how to make Minecraft toys is a brilliant way to disconnect from the screen and engage your creativity. It is a hobby that combines geometry, art, and the spirit of exploration.
You do not need an expensive 3D printer or a workshop filled with power tools to get started. In fact, some of the best toys are made from simple cardboard, paper, and tape. This guide will walk you through the essential techniques to build your own collection. Grab your crafting table—or just your kitchen table—and let’s get started.
Key Takeaways
- Cardboard Creativity: Learn how to turn recycled boxes into life-sized Minecraft gear with basic tools.
- Safety First: Prioritize child-friendly materials like non-toxic glue and safe cutting tools for every project.
- Papercraft Magic: Use free printable templates to fold and assemble 3D characters in minutes.
- Personalization: Add unique textures like felt or paint to give your Minecraft toys a professional look.
- Budget-Friendly: Most toys can be made for free using items you already have sitting in your recycling bin.
The Magic of Cardboard: Building Mobs
Cardboard is the ultimate building block for Minecraft fans. Its square shape is perfect for mimicking the blocky style of the game. When you learn how to make Minecraft toys using cardboard, you are essentially building a real-life version of the game’s core mechanic.
Choosing Your Materials
You want boxes that are sturdy but easy to cut. Cereal boxes are great for smaller items like items or tools. Larger shipping boxes work best for full-sized armor or big mobs like Iron Golems. Always keep a sharp pair of safety scissors and a roll of masking tape handy. Masking tape is fantastic because you can paint directly over it once you are done.
Structural Integrity Tips
The secret to great Minecraft toys is the square edge. Use a ruler to draw your lines before you cut. When joining two pieces of cardboard, create a “tab” by folding the edge of one piece. This gives you a surface to apply glue or tape, ensuring your toy stays together during playtime. For larger structures, use hot glue, but make sure a parent helps if you are younger.
Papercraft: The Easiest Way to Start
If you want to know how to make Minecraft toys that look exactly like the characters in the game, papercraft is your best bet. This method involves printing out flat designs, folding them into 3D shapes, and gluing the tabs.
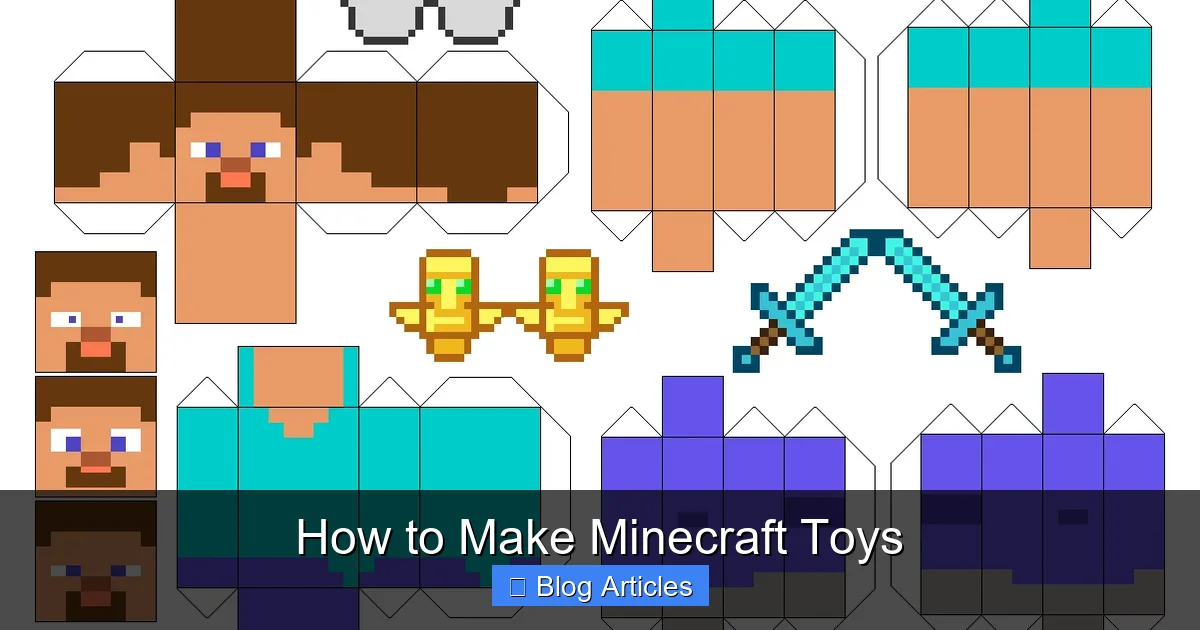
Visual guide about How to Make Minecraft Toys
Image source: images-wixmp-ed30a86b8c4ca887773594c2.wixmp.com
Finding the Best Templates
There are thousands of free templates available online for 2026. You can find everything from Steve and Alex to complex Redstone contraptions. Look for high-resolution images to ensure your toys have crisp colors. If you don’t have a color printer, you can print the designs in black and white and color them in yourself for a custom look.
Refining Your Paper Toys
To make your paper toys last longer, print your templates onto cardstock instead of regular printer paper. Cardstock is thicker and holds its shape better. Once assembled, you can brush a thin layer of clear craft glue or decoupage over the outside. This gives the toy a slight sheen and adds a protective layer that helps it survive accidental drops.
Crafting Iconic Tools and Weapons
Every adventurer needs a trusty pickaxe or a sword. Knowing how to make Minecraft toys like weapons allows you to roleplay your favorite in-game scenarios. These projects are simple enough for a rainy afternoon but impressive enough to display on your shelf.
The Diamond Sword Project
Start by drawing a grid on a large piece of cardboard. Minecraft gear is made of 16×16 or 32×32 pixel patterns. If you follow this grid, your weapon will look perfectly pixelated. Use blue paint for the blade and brown paint for the handle. If you want to get fancy, use glitter glue to add a little bit of “enchanted” sparkle to the blade.
Adding Texture with Felt
Sometimes cardboard can feel a bit plain. You can glue squares of colored felt onto your cardboard weapons. This creates a soft, tactile surface that makes the toy feel much higher quality. It also acts as a grip, making the sword easier to hold during pretend battles.
DIY Minecraft Blocks for Decoration
What is Minecraft without the blocks? Grass, dirt, stone, and ores are the foundation of everything you build in the game. Learning how to make Minecraft toys based on blocks is an easy way to decorate your bedroom.
Making Glowing Ores
This is a favorite among DIY enthusiasts. Get a small square tissue box or a custom-cut cardboard cube. Cut out small squares on each side to create a pattern. Place a battery-operated LED tealight inside the box. When you turn it on, the light shines through the holes, creating a glowing ore block that looks amazing at night.
Painting Perfect Pixels
To get that authentic look, you need to master the pixelated paint job. Use a small square sponge brush instead of a traditional bristle brush. Dip the sponge in paint and dab it onto the cardboard. This creates a uniform square shape that mimics the pixels in the game perfectly. Keep your lines straight by using painter’s tape to mask off your squares.
Interactive and Movable Parts
Static toys are fun, but moving parts make them special. If you want to know how to make Minecraft toys that have articulation, you have to think like an engineer. Adding joints allows your Steve or Enderman to sit, wave, or hold items.
Using Fasteners for Joints
The simplest way to create a joint is with a small brass fastener. Poke a hole through the two parts you want to connect, push the fastener through, and split the ends on the back. This allows the limbs of your character to pivot. Make sure you use a bit of cardboard on the inside to reinforce the area so the limb doesn’t rip off.
Magnetic Interactions
For more advanced crafters, small neodymium magnets are a game-changer. Glue a magnet inside the hand of a player figure and another one inside a tool. Now, your character can “hold” the pickaxe! Just be sure to supervise younger children, as magnets can be dangerous if swallowed.
Customizing and Displaying Your Collection
Once you have finished your projects, you want to show them off. Learning how to make Minecraft toys is only half the battle; the rest is creating a world where they can live. Consider building a diorama shelf where you can arrange your mobs and blocks.
Creating a Diorama
Use a sturdy bookshelf or a shoebox laid on its side to act as your stage. Cover the bottom with green paper to represent grass and the back with blue paper for the sky. You can even cut out trees from cardboard to populate your little corner of the Minecraft universe.
Final Tips for Success
Remember that the beauty of DIY is that it doesn’t have to be perfect. Even if a box is slightly crooked or a line of paint is a bit wavy, it adds character to the piece. If you make a mistake, don’t worry! In Minecraft, you can just break a block and place it again. Approach your physical crafting projects with that same mindset. Keep experimenting, keep building, and most importantly, have fun with your creations.
In conclusion, you now have the tools and the knowledge to bring the blocky world into your own home. By following these steps on how to make Minecraft toys, you are sharpening your creative skills and building a collection that is uniquely yours. Whether you choose to work with paper, cardboard, or felt, the process of making is just as rewarding as the play. So, gather your materials, clear your desk, and let your imagination roam free!
Frequently Asked Questions
Can I make these toys without using any power tools?
Yes, absolutely! All the projects mentioned in this guide use basic household tools like scissors, glue, and tape. Safety is our priority, so we focus on methods that are fun and easy for everyone to handle.
Where can I find free Minecraft templates for papercraft?
There are many reputable gaming websites and craft blogs that offer free, high-quality PDF templates. Simply search for “Minecraft papercraft templates” in your favorite search engine to find a wide variety of character designs.
What is the best type of glue for cardboard projects?
A standard school glue is fine for paper, but for cardboard, a hot glue gun provides the strongest bond. If you prefer to avoid hot glue, a strong craft glue or masking tape can also hold your structure together effectively.
How can I make my Minecraft toys last longer?
To increase durability, you can apply a layer of clear coat or decoupage glue over the finished project. Using thicker materials like cardstock or corrugated cardboard also helps the toys keep their shape over time.
Are these projects suitable for younger children?
Yes, most of these projects are great for children, though younger ones may need help with cutting or using glue. It is a fantastic family activity that allows parents and kids to work together on a shared creative goal.
Can I paint over the cardboard?
Definitely! Acrylic paints work best on cardboard because they cover the brown color easily and dry quickly. Using a sponge brush helps you get that sharp, pixelated look that is characteristic of the Minecraft style.