
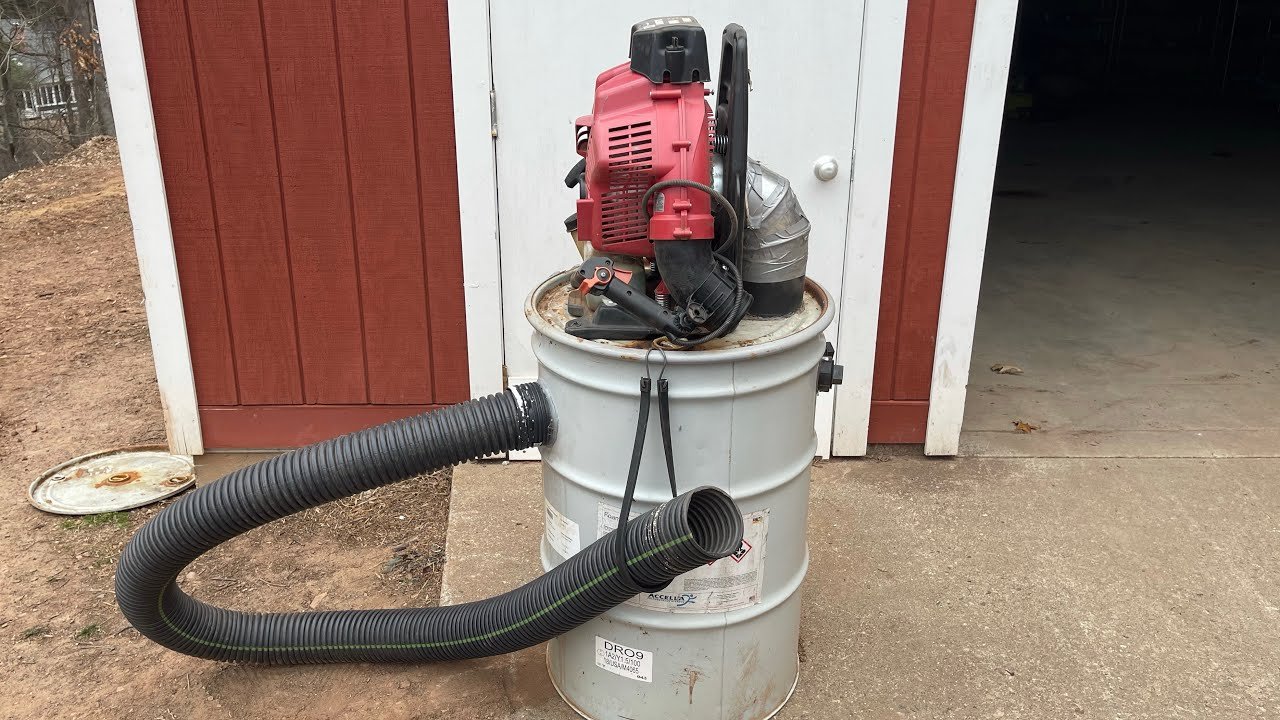
Yes, some leaf blowers can convert into garden vacuums, but only when the model is designed for that job. A convertible leaf blower usually needs a vacuum tube, collection bag, and a built-in impeller that chops leaves as they pass through.
You should not attach a random hose or bag to a standard blower. The motor, fan, and housing may not support suction. Check the owner’s manual for terms such as “blower vacuum,” “vacuum mode,” or “mulcher.” This guide explains how the conversion works, how to do it safely, and when you need a different tool.

How Does a Leaf Blower Become a Vacuum?
A convertible leaf blower changes the direction of air. In blower mode, the fan pushes air out through the nozzle. In vacuum mode, the fan pulls air through a vacuum tube and sends the debris into a collection bag.
Many models also include a mulching impeller. This rotating part breaks leaves into smaller pieces before they enter the bag. Smaller pieces take up less space and may break down faster in a compost pile, although the actual reduction rate depends on the model and the material.
A typical leaf blower vacuum has these parts:
- Vacuum tube: Carries leaves into the machine.
- Impeller: Pulls in and may chop leaves.
- Collection bag: Holds the shredded debris.
- Mode switch or tube position: Changes the airflow path.
- Safety interlock: Prevents operation unless the correct cover or tube is installed.
Some tools use a switch to change modes. Others require you to remove the blower nozzle, install a vacuum tube, and attach a collection bag. Gas-powered units may use a separate intake cover, while electric models often have a safety lock that must be engaged.
The design matters because a vacuum impeller can meet harder objects than a blower nozzle normally does. A proper vacuum kit protects the user and keeps the air path balanced.

Can Every Leaf Blower Be Converted Into a Vacuum?
No. A standard leaf blower cannot always be converted into a vacuum. Conversion is possible only if the manufacturer designed the tool for vacuum use or sells an approved vacuum attachment for that exact model.
Use this quick check:
| What you find | What it means |
|---|---|
| The manual lists vacuum mode | The tool is designed for conversion |
| A matching vacuum tube and bag are sold by the manufacturer | Conversion may be supported |
| The housing has a marked vacuum inlet | The model may accept a kit |
| The manual says “blower only” | Do not convert it |
| No model-specific kit exists | Do not improvise an attachment |
| The tool has a sealed or enclosed fan area | It may not be made for suction |
A blower may look like a vacuum from the outside but still lack the correct intake guard, impeller, bag support, or safety switch. Manufacturer parts are usually model-specific. Even two tools from the same brand may use different tubes and bags.
Before buying a kit, find the model number on the tool. It may be printed near the handle, battery slot, engine housing, or rating label. Search the manufacturer’s parts page or manual using that exact number.
What You Need Before converting a Leaf Blower
Gather the correct parts and prepare the work area before changing modes. You may need:
- The owner’s manual
- The approved vacuum tube
- The matching collection bag
- A tool for removing screws, if the manual requires one
- Safety glasses or goggles
- Hearing protection
- Work gloves
- Long pants and closed-toe shoes
- A cleared, dry work area
Disconnect the power before changing any part. For a corded blower, unplug it. For a battery blower, remove the battery. For a gas blower, turn it off, let it cool, and follow the manual’s instructions before working near the impeller or intake.
Do not work on a running tool. The impeller can start unexpectedly if the power source remains connected.
Inspect the vacuum bag before use. Replace it if the fabric is torn, the zipper is damaged, or the connection collar does not lock firmly. A loose bag can release dust and debris toward the operator.

How to Convert a Leaf Blower Into a Vacuum
The exact steps vary by brand and model. Use the owner’s manual as the final authority, but this general process applies to many convertible units.
1. Turn off and disconnect the tool
Stop the blower completely. Unplug it or remove its battery. If it has a gas engine, shut it down and allow hot parts to cool.
Place the tool on a stable surface. Keep your fingers away from the intake and impeller area.
2. Remove the blower nozzle
Some models use a twist-lock nozzle. Others use clips or screws. Remove only the part described in the manual.
Do not force a nozzle that will not release. A stuck part may indicate that a retaining screw, latch, or safety lock is still engaged.
3. Install the vacuum tube
Fit the vacuum tube onto the marked intake opening. Push or twist it into place until it locks.
The tube should sit straight and feel secure. If it wobbles, leaves a gap, or will not trigger the safety interlock, stop and check the installation.
4. Attach the collection bag
Connect the bag to the outlet specified by the manual. Make sure the collar is fully seated and the zipper is closed.
Keep the bag away from the muffler on gas models. Heat can damage the fabric or create a fire risk.
5. Confirm the mode setting
Set the tool to vacuum mode if it has a mode selector. Some machines change modes automatically when the correct tube and cover are installed.
Never run the tool with a missing intake cover, loose tube, or unconnected bag. These parts help direct debris and protect the rotating components.
6. Test it briefly
Move to a small area with a few dry leaves. Start the tool and check for steady suction.
Stop at once if you hear metal contact, strong vibration, unusual grinding, or a burning smell. These signs may indicate a blocked tube, damaged impeller, loose part, or overloaded motor.

How to Use a Leaf Blower Vacuum Safely
Use a blower vacuum only on dry leaves and light yard debris unless the manual specifically allows other material. Wet leaves can form dense clumps that block the tube and overload the motor.
Walk slowly. Keep the vacuum tube near the ground, but do not press it into soil, gravel, mulch, or grass. A strong vacuum can pull in stones, sticks, pine cones, and other objects that may damage the impeller.
Before vacuuming, remove:
- Rocks and gravel
- Metal objects
- Glass
- Cans and plastic
- Large sticks
- Toy parts
- Garden wire
- Animal bones
- Hot ash or burning material
Wear eye protection because debris can move at high speed near the intake. Hearing protection is also sensible, especially with gas-powered equipment.
Never vacuum:
- Burning leaves or embers
- Gasoline or other flammable liquids
- Chemical spills
- Wet electrical material
- Asbestos-containing debris
- Large amounts of fine construction dust
- Animal waste unless the manual clearly permits it
A leaf vacuum is a yard tool, not a general-purpose shop vacuum. Fine dust can pass through some bags and may damage the motor or expose you to harmful particles.
Keep children, pets, and bystanders away from the work area. The vacuum can hide sharp objects inside the leaf pile until the impeller strikes them.
Why Is My Leaf Blower Vacuum Not Working?
Most problems come from a blocked tube, poor installation, a full bag, or debris that is too wet.
| Symptom | Likely cause | Safe first check |
|---|---|---|
| No suction | Tube is loose or blocked | Disconnect power and inspect the tube |
| Weak suction | Bag is full or wet | Empty and dry the bag |
| Tool stops | Motor protection activated | Let it cool and remove the blockage |
| Loud vibration | Hard object or damaged impeller | Stop using it and inspect under the manual’s instructions |
| Dust escapes | Bag is torn or unsealed | Replace or reseat the bag |
| Leaves will not enter | Material is too wet or large | Use dry leaves and remove sticks |
| Motor sounds strained | Intake is restricted | Clear the path only after disconnecting power |
Always disconnect the power before clearing a blockage. Do not use your hand to reach into the intake. A stick or tool may be safer for removing material, but only when the manual permits it and the machine is fully disconnected.
If the impeller is cracked, bent, or missing a blade, stop using the tool. Do not straighten or weld an impeller at home. A damaged rotating part can fail at high speed and should be replaced with the correct part by the manufacturer or a qualified repair shop.

Can You Use a Leaf Blower Vacuum on Wet Leaves?
Usually, wet leaves should be avoided. They are heavier and tend to stick together inside the tube and bag. This can reduce airflow, clog the impeller, and place extra strain on the motor.
A small amount of damp material may pass through some models, but that does not mean the tool is rated for wet use. The owner’s manual may prohibit wet leaves or require the machine to remain dry.
For better results:
- Wait until the leaves are dry.
- Clear large sticks and hard objects first.
- Vacuum in thin layers instead of one deep pile.
- Empty the bag before it becomes heavy.
- Dry the bag and tube after use.
Do not use a blower vacuum in rain or standing water unless the manufacturer specifically permits it. Electricity, moisture, and yard debris create avoidable hazards.
Is a Leaf Vacuum Better Than Raking?
A leaf vacuum can save time in open areas, but a rake may work better in tight or delicate spaces. The best choice depends on the yard surface, leaf volume, and cleanup goal.
| Task | Leaf vacuum | Rake |
|---|---|---|
| Large lawn with dry leaves | Fast and convenient | Slower |
| Gravel bed | Risk of pulling in stones | Safer |
| Wet leaves | Often poor performance | More reliable |
| Around flowers | May damage plants or pull soil | Better control |
| Compost collection | Direct collection in bag | Requires a second gathering step |
| Small area | May take setup time | Simple and quiet |
A blower vacuum also has limits on bag capacity. You may need to stop often to empty it. A rake and tarp can move a large volume of leaves with less risk to the machine.
Many homeowners use both tools: rake leaves away from beds and gravel, then vacuum dry leaves from open lawn areas.

Should You Buy a Dedicated Leaf Vacuum Instead?
A dedicated leaf vacuum may make sense if you regularly collect large amounts of leaves. It is built around suction and collection rather than switching between two functions.
Choose a convertible blower vacuum when you want one tool for:
- Clearing patios and lawns
- Gathering dry leaves
- Occasional mulching
- Small to medium seasonal cleanup
Consider a dedicated leaf vacuum when you need:
- Longer vacuum sessions
- A larger collection capacity
- More frequent fall cleanup
- A wider intake
- A wheeled design for heavy debris
A dedicated machine is not automatically better. It may cost more, take up more storage space, and still require regular cleaning. The key question is how much material you collect and how often you use vacuum mode.
Check the bag capacity, replacement parts, tube diameter, power source, and manual restrictions before buying. For cordless models, also consider whether the battery and charger are included. Runtime depends on battery size, debris density, and operating conditions.
Common Mistakes to Avoid
Avoid these mistakes when turning a leaf blower into a vacuum:
- Using a homemade hose or bag: The connection may fail or expose the impeller.
- Running without the correct cover: This can change airflow and increase injury risk.
- Vacuuming rocks: Hard objects can damage the impeller.
- Overfilling the bag: A full bag reduces airflow and makes the tool harder to carry.
- Pulling the tool through deep leaves: This can block the intake.
- Clearing clogs while connected to power: The impeller may move without warning.
- Using the tool on wet material: Moist debris can clog and add weight.
- Ignoring vibration: New vibration may signal internal damage.
- Mixing parts from different models: Tubes and bags may look similar but fit differently.
- Skipping the manual: The manual lists the approved setup and material limits.
If the machine does not operate after correct installation, do not bypass a safety switch. Contact the manufacturer or an authorized repair provider.

Frequently Asked Questions
Can I turn a regular electric leaf blower into a vacuum?
Only if the manufacturer designed that model for vacuum use or provides an approved conversion kit. A regular blower without a compatible intake, impeller setup, and collection system should not be modified.
Can I use a leaf blower vacuum without the bag?
No. The bag collects the air and debris leaving the machine. Operating without it can spread debris, expose you to dust, and create unsafe airflow.
Does a leaf blower vacuum mulch leaves?
Many convertible models do, but not all. Check the manual for a mulching function and any stated limits. Do not assume that every vacuum impeller provides the same level of leaf reduction.
Can a leaf blower vacuum pick up pine needles?
Often, yes, if the needles are dry and the intake does not clog. Pine cones, thick twigs, and woody debris should be removed first unless the manual clearly allows them.
Can I vacuum leaves directly into a trash can?
Only when the tool has a manufacturer-approved attachment for that purpose. Do not connect the blower vacuum to a trash can with tape, an improvised hose, or a homemade adapter.
Conclusion
You can turn a leaf blower into a vacuum only when it is a convertible model or has a manufacturer-approved vacuum kit. The setup usually requires a vacuum tube, collection bag, and the correct intake cover or mode setting.
Before using it, disconnect the power, check the manual, clear hard objects from the leaves, and test the machine with a small amount of dry debris. If your blower is marked for blower use only, do not modify it. Use a rake, a dedicated leaf vacuum, or a purpose-built conversion kit instead.
The next step is simple: find your blower’s exact model number and confirm whether the manufacturer lists vacuum mode and compatible parts.