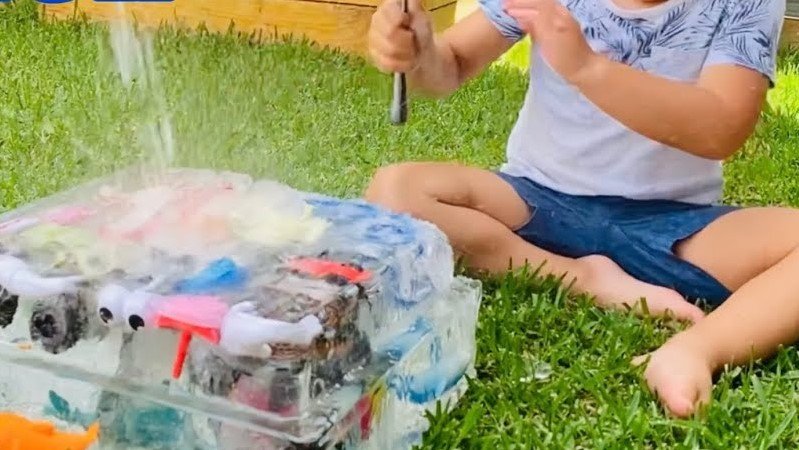
Freezing toys in ice is the ultimate low-cost sensory activity that keeps children engaged for hours while developing fine motor skills. By trapping favorite figurines in layers of frozen water, you create an exciting “rescue mission” that turns a simple afternoon into a magical, chilly adventure.
If you are looking for the perfect activity to keep your kids busy on a rainy day or a hot afternoon, look no further than your own freezer. Learning how to freeze toys in ice is one of the most rewarding, budget-friendly ways to create a world of wonder for children of all ages. It transforms everyday plastic figurines into “frozen artifacts” that need to be rescued, sparking creativity and intense concentration that can last for hours.
In 2026, we are seeing a massive shift back to simple, hands-on play. Screens are everywhere, but nothing beats the tactile experience of breaking through a block of ice to retrieve a buried treasure. Whether you are using small dinosaurs, plastic sea creatures, or superhero action figures, the process of trapping them in ice creates a sense of mystery. It is not just a game; it is a full sensory exploration that helps kids practice patience, persistence, and problem-solving skills.
Key Takeaways
- Preparation is key: Choose toys that are waterproof and non-porous to ensure they remain clean and safe for future play.
- Layering creates depth: By freezing in stages, you can suspend toys at different heights, making the ice block look like a frozen museum.
- Add sensory flair: Use food coloring, glitter, or small beads to enhance the visual appeal of your frozen masterpiece.
- Safety first: Always supervise children, especially when using tools to “excavate” the toys, and ensure the ice isn’t sharp.
- Rescue tools matter: Provide warm water, droppers, and salt to help kids melt the ice, which teaches them basic science concepts.
Choosing the Right Toys and Containers
Before you start your freezing project, you need to pick the right components. Not every toy belongs in a block of ice. Think about the durability of your collection. You want items that can handle the expansion of water as it turns to solid ice without cracking or snapping.
Selecting Safe Toys
Always choose hard, plastic, or rubber toys. Avoid anything with internal electronics, batteries, or delicate cloth parts. If a toy is porous, like some types of squishy foam, it might absorb water and get moldy later on. Smooth, solid plastic animals, building blocks, or waterproof dolls work the absolute best. If you can wash the toy in the dishwasher, it is perfect for being frozen.
Finding the Perfect Container
The container you choose will dictate the shape of your ice block. Plastic food storage containers are great because they are flexible. When the ice is fully frozen, you can gently squeeze the sides of a plastic container to pop the ice out. Avoid glass, as it can crack under the pressure of expanding water. You can also use silicone cake molds to create fun shapes, like hearts, stars, or spheres, which add an extra layer of visual excitement to the activity.
The Step-by-Step Freezing Process
The secret to achieving that “pro” look where toys are suspended in the middle of the block is layering. Many parents make the mistake of dumping all the toys in at once and filling the container with water. This usually results in all your toys floating to the top in a clump. By using the layering method, you control the position of every single item.
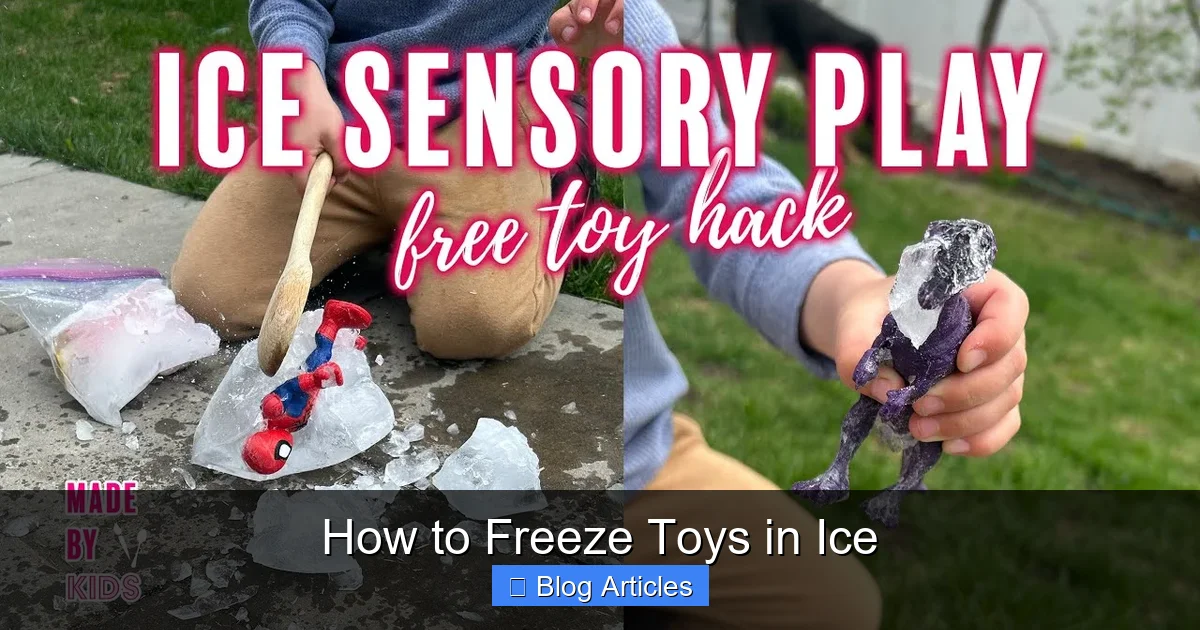
Visual guide about How to Freeze Toys in Ice
Image source: i.ytimg.com
Step 1: The First Layer
Fill your container with about one inch of water. Place it in the freezer for about two hours until it becomes a slushy, firm base. This gives you a solid foundation to work with so your toys do not sink to the very bottom and get stuck against the container floor.
Step 2: Adding the First Batch
Place a few toys onto your frozen base. If you want them to stay in specific spots, you can use a tiny bit of water to “glue” them down by freezing them for another thirty minutes. Once they are secure, add another layer of water to cover them completely. Put the container back in the freezer.
Step 3: Building the Depth
Continue this process until your container is full. By the time you reach the top, you will have a deep, layered ice block that looks like a frozen ocean or a prehistoric park. If you want to get creative, add a drop of blue food coloring to one layer or sprinkle a pinch of bio-degradable glitter in another to create a beautiful, sparkling effect.
Enhancing the Sensory Experience
When you finally reveal the ice block to your children, the magic really happens. However, you can make the experience even more engaging by curating how they “interact” with the ice. This turns the play into a science-meets-adventure activity.
Adding Color and Texture
Try mixing a few drops of food coloring into the water before you freeze it. You can even make the block rainbow-colored by freezing thin, tinted layers one at a time. Consider adding natural elements like small leaves, flower petals, or plastic gems. These additions change the texture and make the excavation process feel more like a treasure hunt or an archaeological dig.
Creating the “Rescue” Kit
Never just hand over an ice block! To make the activity interactive, provide a “rescue kit.” This should include a small spray bottle filled with warm water, a plastic dropper, and perhaps a small amount of salt in a bowl. Explain to the children that they are explorers or scientists tasked with freeing the frozen toys. The salt will melt tiny holes in the ice, and the warm water will help them chip away at the layers. This is a fantastic way to teach them about the properties of water and how salt lowers the freezing point.
Managing the Excavation Area
Let’s be honest: playing with ice is messy. It is cold, wet, and can quickly turn your floor into a puddle. Being prepared is the difference between a stressful afternoon and a fun one. Always plan your play location carefully.
Indoor vs. Outdoor Play
If the weather is nice, take the activity outside. Place the ice block on a large tray or in a shallow plastic bin on the grass. The mess will just water your lawn! If you are stuck inside, a large baking sheet with high sides or an under-bed plastic storage bin works wonders. Place a towel underneath the bin to catch any splashes or condensation. Having the right containment makes cleanup a breeze.
Setting the Scene
You can turn the excavation into a story. If you froze plastic arctic animals, tell your child they are “rescuing them from a blizzard.” If you froze dinosaurs, call them “dino-diggers” looking for fossils. Adding a simple narrative helps children stay focused on the task. They aren’t just melting ice; they are saving the day!
Post-Play Care and Clean Up
Once the toys are rescued, the activity isn’t quite over. Proper cleanup ensures your toys stay in good condition and are ready for the next freezing round. This is also a great time to teach kids about taking care of their things.
Cleaning the Toys
After the toys are freed from the ice, they might be cold and wet, but they are also clean. Give them a quick wash in warm, soapy water to remove any salt or food coloring residue. Dry them off thoroughly with a soft cloth. This prevents any water spots and ensures they are stored in a dry, safe environment.
Refreezing and Reusing
Don’t throw away the water! If you have leftover ice shards, you can collect them in a bucket and use them for a secondary sensory activity. When the kids are done, let the plastic bins air dry completely. Storing toys that are slightly damp can lead to unpleasant smells or mildew over time. Once everything is dry, put them back in your toy bin, and you are all set for the next time someone asks to play with the ice.
The Long-Term Benefits of Sensory Play
Why do we love this activity so much? It hits on several developmental milestones. When children try to melt the ice, they are exercising their fine motor skills through squeezing droppers and using small tools. They are practicing concentration as they wait for the ice to yield to their efforts.
Furthermore, this activity is incredibly grounding. In our fast-paced 2026 world, the slow, methodical process of melting ice forces children to slow down. It is a form of mindful play. By the time the last toy is rescued, you will often find that your child is calmer and more settled than they were before. It is simple, effective, and deeply satisfying for everyone involved.
So, the next time you feel the urge to pull out a screen, head to the freezer instead. With a little bit of water and a handful of toys, you have everything you need to create a masterpiece of frozen fun. It is an experience that your children will ask for again and again, and honestly, you might find yourself enjoying the process just as much as they do.
Frequently Asked Questions
What toys are best for freezing in ice?
Hard, smooth, and non-porous plastic toys like dinosaurs, sea creatures, or action figures are best. Avoid toys with batteries, fabric, or porous surfaces that could absorb water or get damaged.
How do I stop all the toys from floating to the top?
Use the layering method by freezing small amounts of water in stages. Freeze a thin base first, place your toys, and then add water in increments to hold them in place.
Can I use food coloring in the ice?
Yes, adding a few drops of food coloring to the water is a great way to make the ice look more vibrant. Just be mindful that heavy coloring might temporarily stain surfaces or hands during play.
How can I make the toys melt faster?
Provide a “rescue kit” with warm water, salt, and small droppers. The salt lowers the freezing point of the ice, while warm water helps chip away the surface faster.
How do I remove the ice block from the container easily?
If you use a flexible plastic container, let it sit at room temperature for five minutes. Then, gently squeeze the sides of the container to loosen the block and flip it over onto a tray.
Is this activity safe for toddlers?
It is generally safe, but constant supervision is necessary to ensure children do not put ice shards or small parts in their mouths. Always use age-appropriate, large toys that pose no choking hazard.