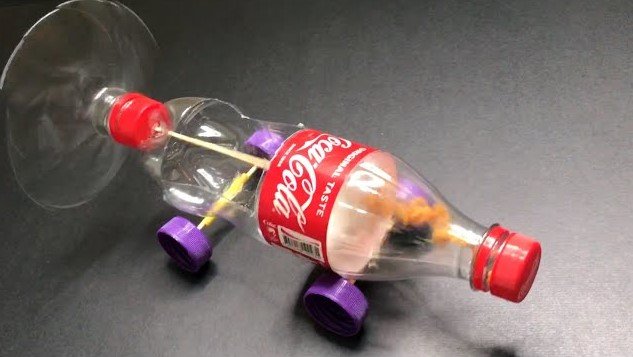
Building a DIY toy car from a plastic bottle is a fantastic way to recycle while sparking creativity. This project uses everyday materials like bottle caps and wooden skewers to teach basic engineering and physics principles in a fun, hands-on environment.
Do you have a few empty plastic bottles sitting in your recycling bin? Before you toss them away, think about the potential sitting right there. In 2026, we are all looking for ways to be more creative and mindful of our planet. One of the best ways to do this is by turning trash into treasure. Learning how to make a toy car with a bottle is more than just a craft project; it is a gateway to understanding how things work.
This project is perfect for a rainy afternoon or a weekend science fair preparation. It is incredibly simple, requires minimal tools, and offers endless fun once the wheels start spinning. Whether you are a parent looking for a bonding activity or a hobbyist interested in sustainable design, this guide will walk you through every step of the process.
Key Takeaways
- Sustainability: Upcycling plastic bottles into toys reduces waste and promotes eco-friendly habits for children.
- Skill Building: This project develops fine motor skills, spatial reasoning, and introductory mechanical engineering concepts.
- Affordability: You can create a high-quality toy using items already found in your kitchen or recycling bin.
- Customization: Each bottle car is unique, allowing for artistic expression through painting and decorations.
- Science Education: Experimenting with wheel sizes and axle placement provides a practical lesson in friction and momentum.
Gathering Your Materials for the Build
The beauty of this project lies in its simplicity. You do not need to go to a hobby store to buy expensive kits. Most of the materials you need are likely already in your home. By repurposing items, you keep waste out of landfills while creating something durable and fun.
The Core Components
To build your vehicle, start with a standard plastic soda or water bottle. Any size works, but the standard 500ml or 1-liter sizes are usually the easiest to handle. You will also need four plastic bottle caps to act as your wheels. Try to find caps of the same size so your car does not tilt to one side.
Hardware and Tools
For the axles, wooden skewers work best because they are lightweight and sturdy. If you do not have skewers, plastic straws or thin dowel rods can also work. You will need a way to attach the axles to the bottle body, such as drinking straws or small pieces of scrap cardboard. Finally, gather a pair of scissors, some strong tape or a hot glue gun, and a drill or a sharp nail to punch holes through your caps.
Preparing the Chassis and Axle System
The body of your car, or the chassis, is the plastic bottle itself. How you prepare this surface determines the stability of your vehicle. You want the bottle to be sturdy enough to hold the weight of the axles without collapsing.
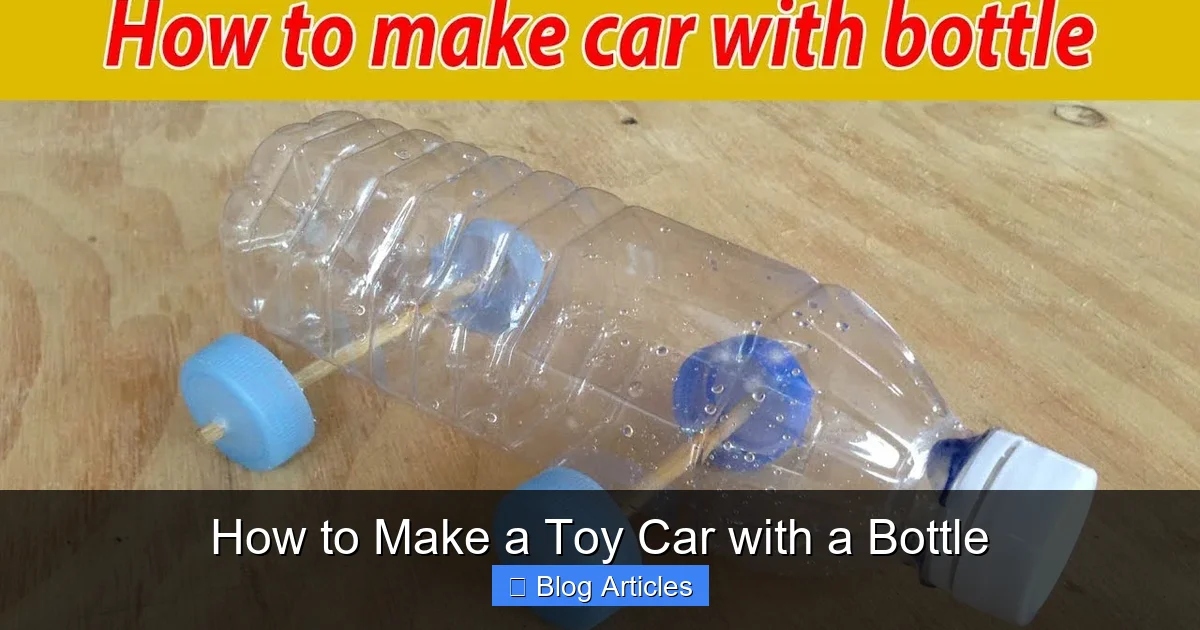
Visual guide about How to Make a Toy Car with a Bottle
Image source: i.ytimg.com
Creating the Axle Housing
You cannot just stick a skewer directly through the plastic bottle, as it will create too much friction. Instead, you need to create “sleeves” for your axles. Cut two pieces of plastic drinking straw, each slightly wider than the width of your bottle. Glue these straws horizontally across the bottom of the bottle. Ensure they are perfectly parallel; if they are crooked, your car will not drive straight.
Ensuring Smooth Movement
Once the straws are glued firmly, slide your wooden skewers through them. The straw acts as a bearing, allowing the skewer to spin freely inside. This is the secret to a fast car. If the skewer is rubbing against the plastic bottle itself, add a little extra glue or a small spacer to lift the axle housing just a millimeter away from the body.
Engineering the Wheels and Traction
The wheels are the most critical part of your design. If they are wobbly, the car will not move efficiently. You need to ensure that the center of each bottle cap is perfectly aligned with the axle.
Perfecting Your Wheels
Use a small drill bit or a heated nail to poke a hole exactly in the center of your four bottle caps. If the hole is off-center, the car will “hop” as it rolls. Once the holes are made, press your wooden skewers through the caps. If the fit is loose, use a dab of hot glue to secure the cap to the skewer. You want the axle and the wheels to rotate together as one unit.
Adding Traction
Plastic caps are smooth and can slip on hardwood floors. To give your car better grip, consider adding a layer of rubber bands around the circumference of the bottle caps. This simple hack provides the friction needed to help the car accelerate without spinning its wheels in place. You can also use textured tape, like electrical tape, to create a makeshift tire tread.
Customizing and Styling Your Vehicle
Once the mechanics are finished, it is time to make the car look unique. A bottle car is a blank canvas. In 2026, we have access to all sorts of eco-friendly paints and markers that adhere well to plastic surfaces.
Paint and Decoration
Before painting, it is a good idea to wipe the bottle down with a damp cloth to remove any dust. Acrylic paints work best on plastic. You can use masking tape to create racing stripes or patterns before you start painting. Once the paint is dry, you can add stickers, glitter, or even mount small paper wings to turn your creation into a futuristic flying car.
Weight Distribution
If you want your car to travel further, you might need a little extra weight. Adding a small marble or a few coins inside the bottle can give it enough momentum to coast across the room. Just be sure to secure any loose items inside so they do not shift around and throw off the balance of your car.
Troubleshooting Common Problems
Even the best engineers encounter issues. If your car isn’t rolling correctly, do not get discouraged. Most problems with a bottle car are easy to fix with a few simple adjustments.
Why Isn’t It Straight?
If your car veers to the left or right, the culprit is almost always the alignment of your straw axles. Check that the two straws are perfectly parallel. If they are not, gently peel them off and re-glue them. Sometimes, simply adjusting the way the skewers sit in the straws can straighten out the path of the car.
Managing Friction
If the car feels sluggish, check for friction points. Are the wheels rubbing against the side of the bottle? If so, move the wheels slightly outward on the axle. Is the axle spinning freely in the straw? If you used too much glue and it leaked into the straw, the axle will get stuck. A quick blast of compressed air or a light application of silicone spray can help minimize internal friction.
Testing and Celebrating Your Creation
The final step in learning how to make a toy car with a bottle is testing it. Find a flat, smooth surface like a kitchen floor or a desk. Give it a gentle push and observe how it travels. Does it roll smoothly? Does it drift?
Gather your family and host a race. You can build multiple cars using different bottle shapes maybe a slim water bottle for a sleek racer or a wide juice bottle for a sturdy off-road truck. The variations are endless.
By engaging in this process, you have successfully combined engineering, art, and recycling into one productive afternoon. Enjoy your new creation and remember that the best toys are often the ones you make yourself.
FAQs
What type of glue is best for this project?
A hot glue gun is the most effective tool because it dries quickly and creates a strong bond on plastic. If you do not have one, a strong craft glue or super glue will work, though they require longer drying times.
Can I use something other than wooden skewers for axles?
Yes, you can use thin dowel rods, plastic straws, or even straightened metal coat hangers. Just ensure the material is rigid enough that it does not bend under the weight of the bottle.
How can I make the car roll further?
To increase the distance, ensure your wheels are perfectly aligned and your axles spin freely with minimal friction. Adding a little weight, like a coin in the center of the bottle, can also help maintain momentum.
What if my bottle caps are not the same size?
Using uneven caps will result in an imbalanced car that likely will not roll straight. Try to collect caps from the same brand or type of bottle to ensure they are uniform in size and shape.
Is this project safe for young children?
The project is safe, but it requires adult supervision, especially when using a hot glue gun or a drill to create holes. Always handle sharp tools with care and keep small parts out of reach of very young children.
Can I add a motor to the bottle car?
Yes, you can upgrade your design by adding a balloon-powered engine or a small rubber band propeller system. These additions turn your static toy into a self-propelled vehicle, which is a great next step for budding scientists.