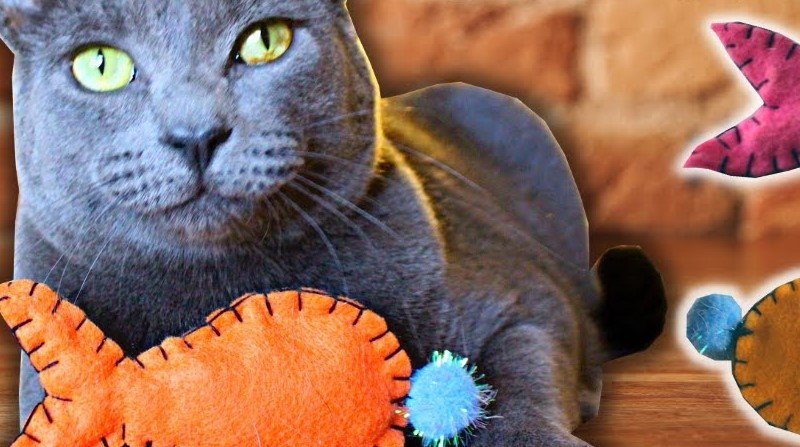
Making your own catnip toys is a fun, budget-friendly way to keep your cat entertained and active. By using simple materials and dried catnip, you can create custom playthings that provide hours of enrichment for your beloved pet.
Have you ever watched your cat go absolutely wild for a new toy, only for them to lose interest twenty minutes later? It is a common struggle for cat parents in 2026. Store-bought toys can be pricey, and sometimes they just do not hold that special spark. The secret to keeping your cat engaged is often as simple as a handful of dried herbs. Learning how to make catnip toys for cats is a rewarding DIY project that saves you money and gives your kitty the ultimate playtime experience.
When you make catnip toys for cats at home, you have total control over the ingredients. Many commercial toys use synthetic fillers or low-quality catnip that loses its scent quickly. By crafting them yourself, you can ensure the materials are safe and the catnip is potent. Plus, there is something truly special about watching your feline friend pounce on a toy you stitched with your own two hands. Let’s dive into how to make catnip toys for cats that will have your pet purring with joy.
Key Takeaways
- Select Safe Fabrics: Always use natural, durable materials like cotton or felt that can withstand rough play.
- Quality Matters: Use organic, high-potency dried catnip to ensure your feline friend feels the effects.
- Keep it Simple: You do not need a sewing machine; hand-sewing or even no-sew glue methods work perfectly.
- Size Appropriately: Design toys that are easy for your cat to bat, kick, and carry around the house.
- Storage Tips: Keep your DIY catnip toys in a sealed container when not in use to preserve the scent.
Choosing the Right Materials for Success
Before you start your crafting session, gathering the right supplies is essential. When you learn how to make catnip toys for cats, you realize that fabric choice is everything. You want something sturdy enough to survive sharp claws but soft enough to be cuddly.
Best Fabrics to Use
Cotton canvas, sturdy felt, and flannel are top-tier choices. These fabrics hold up well to rabbit kicks and aggressive chewing. Avoid stretchy synthetic fabrics that might unravel or pose a choking hazard if a string gets loose. If you have old flannel shirts or cotton scraps lying around, they are perfect for this project. Not only are you recycling, but you are also giving your cat a toy that smells like home.
Selecting High-Quality Catnip
The star of the show is the catnip itself. When you look at how to make catnip toys for cats, always prioritize organic, dried catnip. You can find this at most pet stores or even grow your own if you have a sunny windowsill. Ensure the catnip is free from pesticides and chemical additives. A little goes a long way, so a small bag can last you through many toy-making sessions.
The Basic No-Sew Pouch Method
If you are not comfortable with a needle and thread, do not worry. You can still learn how to make catnip toys for cats without sewing a single stitch. The no-sew method is quick, easy, and incredibly effective for beginners.
Visual guide about How to Make Catnip Toys for Cats
Image source: i1.wp.com
Gathering Your Supplies
You will need a square of felt, some fabric glue or a strong ribbon, and your dried catnip. Felt is excellent because it does not fray when you cut it. You can make simple shapes like squares, fish, or circles without needing to hem the edges.
Step-by-Step Assembly
Place a small tablespoon of catnip in the center of your felt square. Gather the edges together to form a pouch and tie it tightly with a piece of durable twine or ribbon. You can double-knot the string to make sure it stays secure. If you prefer, you can use fabric glue to seal the edges of a folded square. Just make sure the glue is completely dry and non-toxic before handing it over to your cat. This simple design is perfect for cats who love to bat things across the floor.
Advanced Sewing Techniques for Durability
For those who want their toys to last for months, a bit of hand-sewing is the way to go. When you learn how to make catnip toys for cats with basic sewing skills, you can create intricate shapes like mice, kickers, or even tiny pillows that withstand heavy play.
The “Kicker” Toy Design
Kicker toys are long, cylindrical pillows that cats love to hug and bunny-kick with their back legs. To make one, cut a rectangular piece of fabric about 10 inches long and 4 inches wide. Fold it in half lengthwise and sew along the long edge and one short end. Turn it right-side out, stuff it with a mix of catnip and some polyester fiberfill, and then sew the final end closed. The fiberfill adds volume, while the catnip provides the scent.
Ensuring Safety with Stitching
When sewing, always use a backstitch or a tight whipstitch. You want to ensure there are no gaps where the catnip could leak out. Check your seams regularly. If you see a thread coming loose, it is best to repair it immediately or retire the toy to avoid any ingestion risks. Your cat will appreciate the extra effort you put into making the toy sturdy.
Adding Extra Sensory Appeal
How to make catnip toys for cats more exciting? Add sound and texture! While catnip is the primary draw, cats are also predators who respond to movement and noise. Adding small elements can turn a standard toy into a feline favorite.
Incorporate Bells and Crinkle Paper
Consider placing a small, safe jingle bell inside the toy before you seal it. The sound will trigger their hunting instinct. Alternatively, you can use crinkle material—the kind used in baby toys—to give the toy a satisfying crunch when it is squeezed. Just make sure these additions are securely trapped inside the fabric so they cannot be swallowed.
Variety in Textures
If you want to go the extra mile, use different textures on the outside of the toy. You could sew a piece of corduroy on one side and smooth cotton on the other. Cats love tactile stimulation, and having a mix of surfaces makes the toy feel more like “prey” during playtime.
Maintaining Your DIY Toys
Even the best toys lose their scent over time. Once you know how to make catnip toys for cats, you should also know how to keep them smelling fresh. It is all about maintenance and proper storage techniques.
Refreshing the Scent
If the catnip scent starts to fade, you do not need to throw the toy away. Simply place the toy in a plastic bag with a spoonful of fresh dried catnip and shake it up. Let it sit in the bag for 24 hours. The fabric will absorb the essential oils from the fresh catnip, effectively “recharging” the toy. This is a great hack for saving time and resources.
Sanitation and Storage
Between play sessions, store your catnip toys in a sealed jar or a Ziploc bag. This keeps the scent potent and prevents your cat from becoming “immune” to the smell by being exposed to it 24/7. Occasionally, you can spot-clean the fabric with a damp, soapy cloth to remove any cat saliva or dirt. Always ensure the toy is completely dry before letting your cat play with it again.
Conclusion: The Joy of DIY Playtime
Creating your own pet toys is more than just a craft; it is a way to show love to your feline family member. By learning how to make catnip toys for cats, you provide them with stimulation, exercise, and a sense of excitement that helps keep them healthy and happy. Whether you choose the quick no-sew pouch or a hand-stitched kicker, the time spent crafting is worth every second when you see your cat pounce.
Remember that every cat is different. Some might love a small, simple ball, while others prefer a large, crinkly pillow. Feel free to experiment with shapes and sizes as you learn more about what your cat enjoys. With a little imagination and a dash of catnip, you will become your cat’s favorite toy maker in no time. Happy crafting!
Frequently Asked Questions
Is catnip safe for all cats?
Yes, catnip is generally safe for cats, though not all cats react to it due to genetics. It is a non-toxic herb, but it is best to provide it in moderation to keep the experience special.
How often should I give my cat the DIY toys?
It is best to offer the toys a few times a week rather than leaving them out all the time. This helps keep the catnip scent potent and prevents your cat from becoming bored with the item.
Can I wash the toys in the washing machine?
It depends on the materials used. If you used catnip, the scent will wash away, so it is better to spot-clean them with a damp cloth instead of submerging them in water.
What if my cat does not like catnip?
If your cat doesn’t respond to catnip, you can try using silvervine or valerian root as an alternative filling. These herbs often produce a similar playful reaction in cats who are unaffected by catnip.
How long does the scent stay in a homemade toy?
The scent can last for several weeks depending on the quality of the catnip and how often the toy is used. You can “recharge” the scent by putting the toy in a bag with fresh catnip for a day.
Are there any fabrics I should avoid?
Avoid using plastic bits, thin ribbons that could fray, or fabrics with loose sequins or buttons. These can pose choking hazards if your cat chews through the toy during vigorous play.