
Changing a leaf blower spark plug is a simple maintenance task for most gas-powered blowers sold in the United States. Let the engine cool, disconnect the spark plug wire, remove the old plug with the correct socket, check the new plug’s gap, install it by hand, and tighten it to the manufacturer’s specification.
Use the owner’s manual for the exact plug number, electrode gap, and tightening torque. These details vary by brand, engine, and model. Battery-powered leaf blowers do not use spark plugs.

What You Need Before You Start
Gather the right parts and tools before opening the engine. A good setup lowers the risk of cross-threading the plug or dropping dirt into the cylinder.
You may need:
- The correct replacement spark plug
- Spark plug socket, often 5/8-inch or 13/16-inch
- Ratchet and short extension
- Spark plug gap tool
- Clean shop towel or soft brush
- Compressed air, used carefully
- Torque wrench, if the manual lists a torque value
- Work gloves and safety glasses
- A small amount of clean engine oil for stubborn threads, only if the manufacturer allows it
Find the Correct Spark Plug
The right spark plug depends on the engine model. Do not choose a plug only because it looks the same as the old one.
Check these sources in this order:
- The leaf blower owner’s manual
- The model label on the blower
- The manufacturer’s parts catalog
- The number printed on the old plug, if it is still readable
A plug may fit the threads but still have the wrong heat range, reach, terminal style, or electrode design. A wrong plug can cause poor starting, misfiring, overheating, or piston damage.
Check the Required Gap
The spark plug gap is the small space between the center electrode and the ground electrode. The ignition system sends a high-voltage charge across this gap to create the spark.
The correct gap is usually measured in inches or millimeters. Small two-stroke engines often use a narrow gap, but there is no safe universal setting for every leaf blower. Use the specification for your exact model.
Work in a Safe Place
Work outdoors or in a well-ventilated garage with the engine off. Keep gasoline, oil, and cleaning fluids away from flames, heaters, and sparks.
Before starting:
- Allow the engine to cool fully.
- Move the blower away from dry leaves and grass.
- Set the ignition switch to OFF.
- Disconnect the spark plug wire.
- Do not press the primer bulb while the plug is removed.
- Keep the open spark plug hole clean.

How to Change a Leaf Blower Spark Plug
Follow these steps for a typical gasoline-powered leaf blower. Your model may use a different engine cover or plug location, so stop and check the manual if a part does not match.
1. Cool and Clean the Blower
Place the blower on a stable, flat surface. Let the engine cool before touching the cylinder or spark plug.
Brush or blow loose dirt away from the spark plug area. Use short bursts of compressed air and wear eye protection. Dirt around the plug can fall into the cylinder when you remove it.
Do not spray water into the engine or ignition area. Moisture can cause a weak spark and may damage electrical parts.
2. Remove the Spark Plug Boot
Find the thick rubber boot attached to the top of the spark plug. Grip the boot itself and pull it straight off.
Do not pull on the thin ignition wire. Pulling the wire can loosen its connection inside the boot or damage the conductor.
If the boot is stuck, twist it gently while pulling. Do not use a screwdriver to pry against the ceramic insulator.
3. Loosen the Old Plug
Fit the correct spark plug socket over the plug. Turn the ratchet counterclockwise to loosen it.
Keep the socket straight. A crooked socket can crack the porcelain insulator or damage the plug hex.
If the plug will not move, do not use excessive force. Recheck that the socket fits correctly and that you are turning in the correct direction. If the threads feel seized, a repair shop may be safer than forcing the plug and damaging the cylinder head.
4. Inspect the Old Plug
Remove the plug and examine its tip. The condition can provide useful clues, although plug color alone cannot diagnose every engine problem.
| Old plug condition | Possible meaning |
|---|---|
| Light gray or tan deposit | Often consistent with normal combustion |
| Wet with gasoline | Engine may be flooded or not firing |
| Dry, black soot | Rich fuel mix, restricted air flow, weak ignition, or extended idling |
| Oily deposits | Oil entering the combustion chamber or excess oil in a two-stroke fuel mix |
| White, blistered, or badly eroded electrode | Possible overheating, lean running, wrong plug, or advanced wear |
| Cracked ceramic | Installation damage, impact, or a defective plug |
These signs are clues, not proof. A new plug may improve starting, but it will not repair a blocked carburetor, damaged ignition coil, air leak, incorrect fuel mix, or low compression.
5. Compare the New Plug
Place the old and new plugs side by side. Compare:
- Thread diameter
- Thread reach
- Hex size
- Insulator shape
- Terminal style
- Electrode design
- Manufacturer part number
Never install a plug that is longer than the specified plug. A plug with excessive reach may contact the piston or extend too far into the combustion chamber.
6. Set the Spark Plug Gap
Check the gap on the new plug with a spark plug gap gauge. Slide the correct gauge between the center and ground electrodes.
If the gap is too wide, bend the ground electrode inward with the tool. If it is too narrow, lift the ground electrode carefully. Do not press against the center electrode or porcelain.
Avoid using a flat screwdriver or tapping the plug against a hard surface. That can damage the electrode or insulator.
Some new plugs come pre-gapped, but transport and handling can change the setting. Check it instead of assuming it is correct.
7. Install the New Plug by Hand
Place the plug into the socket, then lower it into the threaded hole. Turn it clockwise by hand for several turns.
The plug should start smoothly. If it binds at once, remove it and try again. A spark plug that is cross-threaded can damage the cylinder head, creating a much larger repair.
Do not use the ratchet to start the threads. Hand installation gives you better control.
8. Tighten the Plug Correctly
Tighten the plug with a torque wrench when the owner’s manual provides a torque value. The correct value depends on the plug type, thread size, cylinder-head material, and whether the plug has a gasket or tapered seat.
If the manual does not list torque, follow the spark plug manufacturer’s installation instructions for that plug. Do not guess based on how tight another plug felt.
Overtightening can strip the cylinder-head threads or crack the plug. Undertightening can allow combustion gases to escape and may cause the plug to loosen.
Do not add anti-seize compound unless the plug or engine manufacturer permits it. Anti-seize changes thread friction and can lead to excessive clamping force when the plug is tightened to a dry-thread specification.
9. Reconnect the Spark Plug Boot
Push the boot firmly onto the new plug until it seats. You should feel or hear the terminal engage with the plug tip.
Check that the ignition wire is routed away from the muffler and moving parts. A loose boot can cause intermittent starting, misfires, or an engine that stops under vibration.
10. Test the Leaf Blower
Move the blower to a clear outdoor area. Start it according to the normal procedure in the owner’s manual.
A successful repair usually includes:
- Normal starting after the proper cold-start procedure
- Smooth idle
- Clean acceleration
- No repeated misfire
- No loose plug or ignition wire
Do not hold the throttle wide open for a long period just to test the new plug. Let the engine warm and run under normal conditions.

What to Do If the Leaf Blower Still Will Not Start
A new spark plug does not guarantee that the ignition system is working. Troubleshoot in a safe order.
If the Engine Does Not Crank
Check the basics first:
- The ignition switch is in the ON position.
- The stop switch is not stuck.
- The starter cord is not damaged.
- The flywheel is not blocked.
- The engine is not seized.
If the starter cord will not pull, stop. A mechanical problem may be present, and forcing the cord can cause more damage.
If the Engine Cranks but Does Not Start
Possible causes include:
- Incorrect fuel
- Old or contaminated gasoline
- Incorrect two-stroke fuel-to-oil mixture
- Flooded engine
- Blocked fuel filter
- Restricted carburetor
- Disconnected spark plug boot
- Faulty ignition coil
- Low compression
- Choke left in the wrong position
Use only the fuel type and two-stroke oil ratio specified by the manufacturer. Do not pour raw gasoline into an engine designed for premixed fuel.
If the Plug Is Wet With Fuel
A wet plug often indicates flooding. Move the choke to the setting recommended for a flooded engine and follow the manufacturer’s procedure.
Do not keep pulling the starter cord without a plan. Excess fuel can make starting harder and may wash oil from cylinder surfaces in some engines.
Allow the plug to dry only in a safe place away from flame. Replace it if it is fouled or damaged.
If the Engine Starts but Runs Poorly
A rough-running blower may have a plug problem, but other causes are common:
- Dirty air filter
- Restricted spark arrestor screen
- Damaged fuel line
- Poor fuel
- Carburetor adjustment issue
- Air leak
- Weak ignition coil
- Engine wear
Start with the air filter, fuel condition, plug gap, and boot connection. If those checks do not help, use the model-specific service manual or seek qualified repair help.
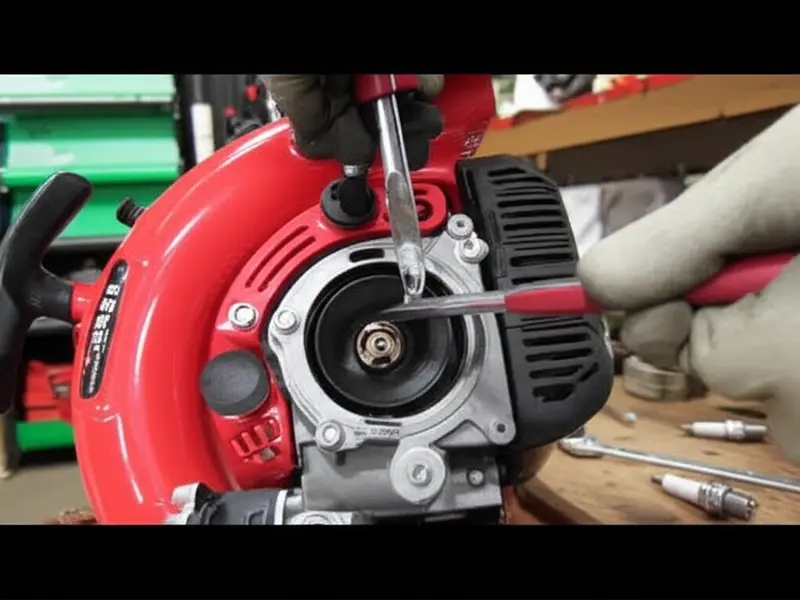
When Should You Replace a Leaf Blower Spark Plug?
Replace the spark plug when it is fouled, worn, cracked, damaged, or outside the service condition listed by the manufacturer.
Some manufacturers provide a scheduled replacement interval. Others tell owners to inspect the plug at a particular maintenance interval and replace it as needed. The correct schedule varies by model and operating conditions.
Replace the plug sooner if the blower:
- Becomes hard to start
- Misfires during acceleration
- Stops after warming up
- Runs unevenly
- Uses more fuel than usual
- Has a damaged electrode or cracked insulator
A spark plug is a wear part. Replacing it can restore reliable ignition, but it cannot correct a fuel, compression, or carburetor fault.
Common Mistakes to Avoid
Installing the Wrong Plug
A plug with the wrong heat range or thread reach may fit but still be unsafe. Verify the exact part number for the blower model.
Skipping the Gap Check
A pre-gapped plug may not match the engine specification. Always measure the gap before installation.
Cross-Threading the Cylinder Head
Start the plug by hand. If it does not turn easily, remove it and inspect the threads.
Overtightening the Plug
More force is not better. Excess torque can damage the plug or cylinder head.
Pulling the Ignition Wire
Pull the rubber boot, not the wire. A damaged wire can create an intermittent fault that is hard to find.
Cleaning the Plug Area Too Late
Clean around the plug before removal. This prevents dirt from entering the cylinder.
Using Starting Fluid Without Checking the Manual
Starting fluid can be unsafe and may damage some two-stroke engines. Use the manufacturer’s starting procedure instead.

Leaf Blower Spark Plug Maintenance Checklist
Use this short checklist during seasonal service:
- Confirm the blower is gasoline-powered.
- Let the engine cool.
- Check the model-specific plug number.
- Clean around the plug.
- Disconnect the boot by gripping the boot.
- Remove the old plug with the correct socket.
- Inspect the old plug for clues.
- Verify the new plug’s type and gap.
- Start the new plug by hand.
- Tighten it to the specified value.
- Reconnect the boot securely.
- Test the blower outdoors.
Keep a spare plug that matches the manufacturer’s specification, especially if you use the blower often or store it for long periods.
Frequently Asked Questions
Can I change a leaf blower spark plug while the engine is warm?
Wait until the engine is fully cool. A warm cylinder head can cause burns, and hot metal can affect how the plug threads engage. A cool engine also makes inspection safer.
How often should I change the spark plug?
Follow the maintenance schedule in the owner’s manual. Replace it sooner if it is fouled, worn, cracked, or causing ignition problems. There is no single replacement interval for every leaf blower.
Do electric or battery leaf blowers have spark plugs?
No. Electric and battery-powered blowers use an electric motor. Spark plugs are used in gasoline engines, including many two-stroke leaf blowers.
Can a bad spark plug damage a leaf blower?
A worn or fouled plug commonly causes hard starting, misfires, or poor running. Severe overheating or an incorrect plug can contribute to engine damage, so use the specified plug and gap.
Should I replace the spark plug if the blower still will not start?
You can replace a visibly damaged or fouled plug, but do not assume it is the only fault. Check fuel, the air filter, the ignition boot, the choke setting, and the manufacturer’s troubleshooting steps. A repair technician should inspect persistent no-start, compression, or ignition problems.
Final Takeaway
To change a leaf blower spark plug, use the exact plug listed for your model, set the correct gap, install it by hand, and tighten it to the manufacturer’s specification. Clean work and gentle handling matter as much as the new part.
If the blower still will not start or runs poorly after the replacement, stop replacing parts at random. Check fuel, air flow, ignition connections, and compression in that order, or have a qualified small-engine technician diagnose the machine.