
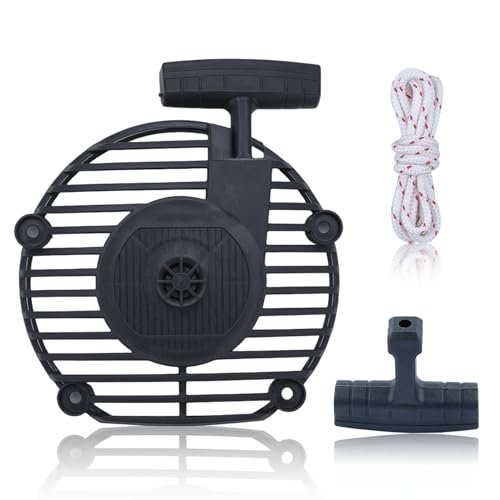
Replacing a leaf blower pull cord is a common repair for gas-powered blowers in the United States. A broken, frayed, or loose starter rope usually does not mean you need a new blower. With the right replacement cord, a few hand tools, and careful spring handling, most homeowners can complete the repair in about 30 to 60 minutes.
The exact cord size, rope length, starter design, and knot style vary by brand and model. Always check the owner’s manual or the old cord before buying replacement rope. This guide applies mainly to recoil starters found on gasoline leaf blowers sold in the U.S.

What You Need Before Starting
Gather the replacement parts and tools before opening the starter housing. The most important part is starter rope made for small engines. Do not use clothesline, nylon utility cord, or ordinary household string. Those materials may stretch, melt, or wear out under repeated pulls.
You may need:
- Correct-size starter rope
- A flat-head or Phillips screwdriver
- Needle-nose pliers
- Scissors or a sharp utility knife
- A lighter or match to seal the rope end
- Work gloves
- Safety glasses
- A socket set, if the starter housing uses bolts
- A clamp or locking pliers
- The leaf blower owner’s manual
Use the old cord as a size guide when possible. Measure its diameter and length before discarding it. If the cord is missing, use the model number to find the correct specification in the owner’s manual or the manufacturer’s parts diagram.
Choose the right replacement rope
Starter rope is sold by diameter. Small-engine recoil starters commonly use a narrow rope, but the correct size depends on the starter pulley and rope opening. Rope that is too thick may not fit through the pulley or handle. Rope that is too thin may break or fail to grip the knot.
Look for these details:
- Rope diameter
- Rope length
- Heat-resistant or starter-rope construction
- Compatibility with the blower model
- Correct replacement handle, if the old handle is damaged
Do not rely only on the blower’s brand. A single brand may use different starter assemblies across several models.

Safety Checks Before Removing the Starter
Turn the leaf blower off and let the engine cool fully. A hot muffler, cylinder, or exhaust shield can cause burns while you work.
For a gasoline blower, move the ignition switch to the OFF position and disconnect the spark plug wire. Pull the wire from the plug by its boot, not by the wire itself. Keep the boot away from the spark plug so the engine cannot start unexpectedly.
For a battery-powered blower, remove the battery and keep it away from the work area. Battery-powered blowers usually do not have pull cords, but some hybrid or engine-powered models may include a recoil starter.
Also:
- Work on a clean, stable surface.
- Wear eye protection when handling the recoil spring.
- Keep fuel away from flames and heat.
- Do not smoke near a gasoline blower.
- Take photos before removing parts.
- Do not force a starter housing that still has tension in it.
The recoil spring inside the starter can unwind suddenly. Some spring assemblies are enclosed in a plastic cassette, while others sit directly behind the pulley. If the spring is broken, loose, or outside its housing, replacement may be safer than trying to rewind it by hand.

How to Replace a Leaf Blower Pull Cord
The basic process is to remove the starter, release the old rope, prepare the pulley, install the new rope, and restore spring tension. Keep the steps in order so the starter does not lose its original position.
1. Remove the starter housing
Locate the recoil starter on the side of the engine. It is usually a round or slightly curved plastic housing with a pull handle attached to it.
Remove the screws or bolts that hold the housing in place. Set each fastener aside in a small container. Some blowers use different screw lengths, so note where each screw belongs.
Lift the starter housing away from the engine. If it does not come off easily, check for another screw or a tab that still holds it in place. Avoid prying hard against the plastic.
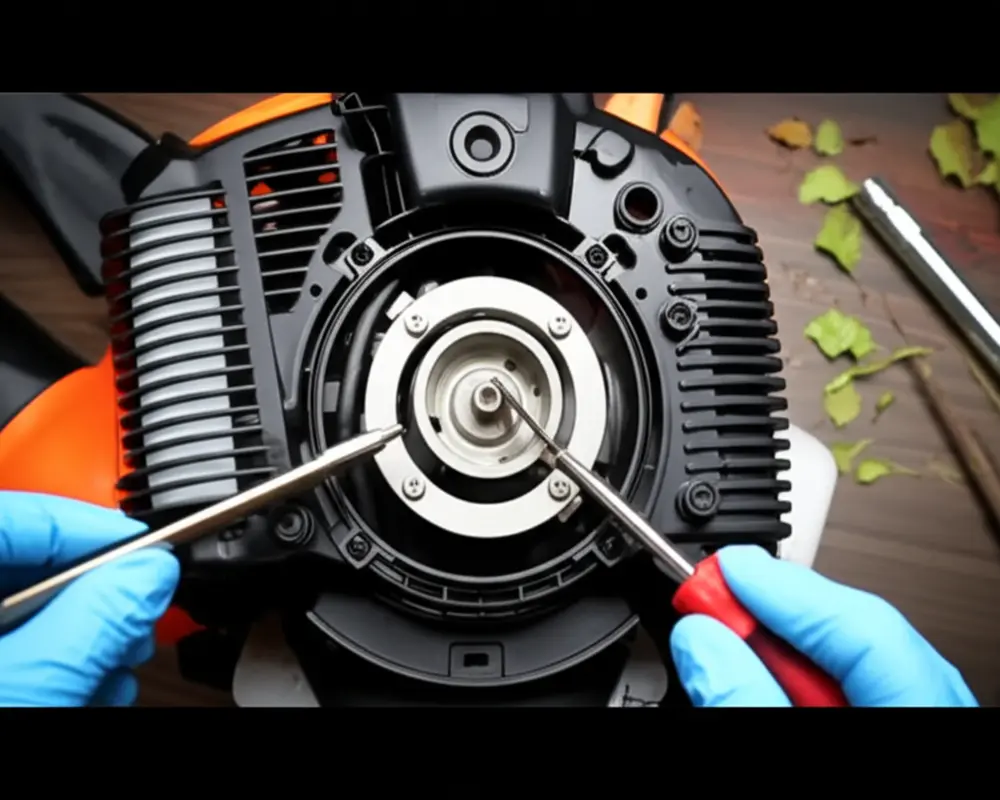
Before taking the pulley apart, photograph the starter from several angles. Record the position of the rope, pulley, handle, and housing.
2. Release the recoil tension
Hold the starter pulley firmly. Slowly allow it to rotate in the direction it normally turns when the rope retracts. This releases tension from the recoil spring.
Do not let the pulley spin freely. A fast release can damage the spring, housing, or pulley. It can also pull the rope end through the opening and cause an injury.
Some recoil starters do not need full tension released before the rope is removed. However, releasing the tension is usually the safer method when replacing the cord.
3. Remove the old cord
Pull the handle away from the housing until you can see the knot. Cut or untie the knot at the handle.
Next, find the rope end attached to the starter pulley. The rope may be secured with an overhand knot, a stopper knot, or a molded retainer. Remove the knot with pliers or cut it carefully.
Pull the old cord out of the pulley and housing. Inspect the pulley and rope openings for sharp edges. A rough edge may have caused the original cord to fray.
If the rope broke inside the starter, remove every loose piece before installing the replacement. A small piece left under the pulley can stop the recoil mechanism from working.
4. Inspect the starter parts
Check these parts before installing the new rope:
- Pulley: It should turn smoothly without cracks.
- Rope opening: It should not have sharp burrs.
- Recoil spring: It should remain attached and provide steady tension.
- Starter housing: It should not be warped or cracked.
- Handle: It should not have sharp edges or a damaged grip.
- Center screw or bearing: It should hold the pulley securely without binding.
A new cord will not fix a broken pulley or recoil spring. Replace the damaged part or the complete starter assembly if necessary.
5. Cut and prepare the new rope
Use the old rope as a length guide when it is available. If the old rope is badly stretched or incomplete, consult the manual or parts diagram instead.
Cut the replacement rope cleanly. Melt the cut end lightly with a flame, then press the softened fibers together with pliers or a nonflammable tool. This keeps the rope from unraveling.
Do not burn a large section of rope. Melted synthetic fibers can be hot and may create harmful smoke. Work outdoors or in a well-ventilated area, away from fuel.
6. Install the rope in the pulley
Find the rope hole in the starter pulley. Feed the new rope through the hole from the correct side. The rope should follow the same path as the old cord.
Tie the rope securely. A compact stopper knot usually works, but the knot must fit inside the pulley without rubbing against the housing. Pull the rope firmly to test the knot.
Keep the free end pointed in the direction of the rope outlet. If the rope crosses itself or rubs against the pulley edge, remove it and install it again.
7. Wind the pulley and restore tension
Turn the pulley in the direction that winds the rope into the starter. Keep turning until the pulley reaches the point where it would normally stop against the starter housing.
The number of turns depends on the model. Use the old cord position, the owner’s manual, or the original pulley marks as a guide. Do not add so much tension that the pulley binds or the handle stays tight against the housing.
Once the pulley has enough tension, align the rope opening in the pulley with the rope outlet in the housing. Clamp the pulley or hold it firmly so it cannot unwind.
Feed the free end of the rope through the housing opening.
8. Attach the pull handle
Push the rope through the pull handle. Tie a secure knot below the handle. Pull the rope hard enough to seat the knot inside the handle.
If the handle has a rope retainer or insert, reinstall it in the same position. The handle should rest close to the housing when the rope is fully retracted, but it should not press hard against the plastic.
Release the pulley slowly. Let it draw the rope back into the housing. Guide the handle as it retracts. If the rope does not retract all the way, the pulley may need another partial turn of tension.
9. Reinstall and test the starter
Place the starter housing back on the engine. Confirm that the rope outlet lines up with the pull handle and that no wire or throttle linkage is trapped beneath the housing.
Tighten the screws evenly. Do not overtighten plastic housing screws, because the mounting tabs can crack.
Before reconnecting the spark plug wire or battery, pull the handle several times. The rope should:
- Pull out smoothly
- Retract without hesitation
- Stay centered in the housing opening
- Stop before the knot strikes the pulley
- Leave the handle in a comfortable resting position
Reconnect the spark plug wire or install the battery only after the starter passes this test. Start the blower outdoors and keep hands, clothing, and loose items away from the intake, fan, and exhaust.

How Much Cord Tension Should a Recoil Starter Have?
A recoil starter needs enough spring tension to pull the rope back into the housing, but not so much that the pulley binds. The correct tension is model-specific.
Use this practical test:
| Test | What you should see |
|---|---|
| Pull the handle slowly | The rope moves smoothly |
| Release the handle while holding it | The rope retracts under control |
| Pull the rope fully out | The pulley does not lock or scrape |
| Let the rope retract fully | The handle stops near the housing |
| Pull several times | The rope does not loosen or twist |
If the handle does not retract, add a small amount of tension. If the starter feels harsh, stops early, or pulls the handle hard against the housing, release some tension.
Never keep adding turns to compensate for a damaged spring. An overloaded spring can break or damage the starter housing.

What to Do If the New Pull Cord Will Not Work
A new rope may fail to retract or pull correctly for several different reasons. Check the simplest and safest causes first.
The rope will not retract
Possible causes include:
- Too little recoil tension
- A rope knot rubbing inside the pulley
- A rope that is too thick
- A bent or cracked pulley
- A loose or broken recoil spring
- A rope that is routed on the wrong side of the pulley
Remove the housing and inspect the rope path. Make sure the pulley turns freely before adding tension.
The rope retracts too hard
Excess tension is the most likely cause. Remove the starter housing and allow the pulley to unwind by one small step at a time. Test it after each adjustment.
A rope that is too short can also create excessive tension. Compare its length with the original specification.
The rope pulls out but the engine does not turn
The starter may not be engaging the engine. Many small engines use starter pawls, dogs, or a cup that engages the flywheel. Inspect these parts for wear, dirt, or breakage.
The problem may not be the pull cord. If the starter pulley spins but the engine does not move, repair or replace the engagement parts.
The rope frays again
Look for a rough rope outlet, sharp pulley edge, misalignment, or a handle that twists the rope. Sanding a minor plastic burr may help, but do not remove enough material to weaken the housing.
If the rope rubs because the starter housing is warped, replace the damaged housing or starter assembly.
The starter spring came out
A spring that has escaped from its housing can snap outward with force. Do not hold it loosely in your hand or try to rewind it without understanding the starter design.
If the spring is damaged, rusty, sharply bent, or difficult to contain, replace the complete recoil starter or have a small-engine repair shop handle it.

Common Mistakes to Avoid
The most common errors happen when people rush the tension step or use the wrong cord.
Avoid these mistakes:
- Using the wrong rope diameter
- Installing ordinary string instead of starter rope
- Letting the pulley spin freely
- Adding too many tension turns
- Tying a bulky knot that rubs inside the pulley
- Pulling the old rope out before taking photos
- Reinstalling screws in the wrong locations
- Testing a gasoline blower indoors
- Pulling the starter with the housing loose
- Ignoring a cracked pulley or damaged recoil spring
Do not glue the rope knot as the main method of attachment. Glue may harden, crack, or fail under repeated shock. Use the correct knot and seat it firmly.
Do not lubricate the rope itself. Oil can attract dust and may make the handle or rope difficult to grip. If the manual allows lubrication, apply only the recommended amount to the specified starter component.
When to Replace the Complete Recoil Starter
Replacing only the cord makes sense when the pulley, spring, housing, and engagement parts are in good condition. A complete recoil starter is often the better repair when several components are damaged.
Consider a complete starter assembly when:
- The recoil spring is broken
- The pulley is cracked
- The center bearing is worn
- Starter pawls will not engage
- The housing is badly damaged
- The cord has failed more than once
- The replacement parts cost nearly as much as the assembly
Match the starter to the exact blower model and engine. Similar-looking assemblies may have different mounting holes, pulley sizes, rope outlets, or engagement mechanisms.
A repair shop is the safer choice if the spring is exposed, the engine has fuel-system problems, or the starter remains unreliable after correct installation.

Key Takeaways
- Disconnect the spark plug wire or remove the battery before starting.
- Use the correct small-engine starter rope.
- Photograph the starter before removing the old cord.
- Release recoil tension slowly.
- Match the new rope length and diameter to the model.
- Inspect the pulley, spring, housing, and rope outlet.
- Add only the amount of tension needed for smooth retraction.
- Replace the full recoil starter if the spring or pulley is damaged.
- Test the mechanism before starting the blower.
Frequently Asked Questions
Can I replace a leaf blower pull cord without removing the starter housing?
Sometimes, but removing the housing usually gives better access and makes it easier to inspect the pulley and spring. Trying to replace the cord in place can cause incorrect routing or uneven tension.
What size rope does a leaf blower use?
The size varies by model. Many small-engine starters use narrow starter rope, but the correct diameter must match the pulley and rope opening. Check the owner’s manual, parts diagram, or original cord.
How long should a leaf blower pull cord be?
The correct length depends on the starter housing and pulley. Use the old cord as a guide if it was the original size. A cord that is too long may not retract fully, while one that is too short can create excess tension.
Why does my new pull cord keep breaking?
Repeated breakage usually points to a sharp rope outlet, rough pulley edge, incorrect rope size, excessive tension, or a damaged starter part. Find and correct the cause before installing another cord.
Can I use a universal recoil starter?
Only if the starter matches the blower’s engine, mounting pattern, pulley, rope outlet, and engagement system. Confirm compatibility by model number rather than appearance alone.
Should I take the blower to a repair shop?
Use a repair shop when the recoil spring is exposed or broken, the starter parts are damaged, or you cannot safely control the spring. A professional can also verify engine engagement and install the correct assembly.
Conclusion
Replacing a leaf blower pull cord is usually a manageable repair when the recoil starter is otherwise sound. The key steps are choosing the correct rope, controlling the spring, copying the original rope path, and setting only enough tension for smooth retraction.
Before operating the blower, test the pull handle several times with the spark plug wire disconnected or the battery removed. If the cord binds, the pulley fails to engage, or the spring appears damaged, stop and replace the faulty starter part instead of forcing the repair.