
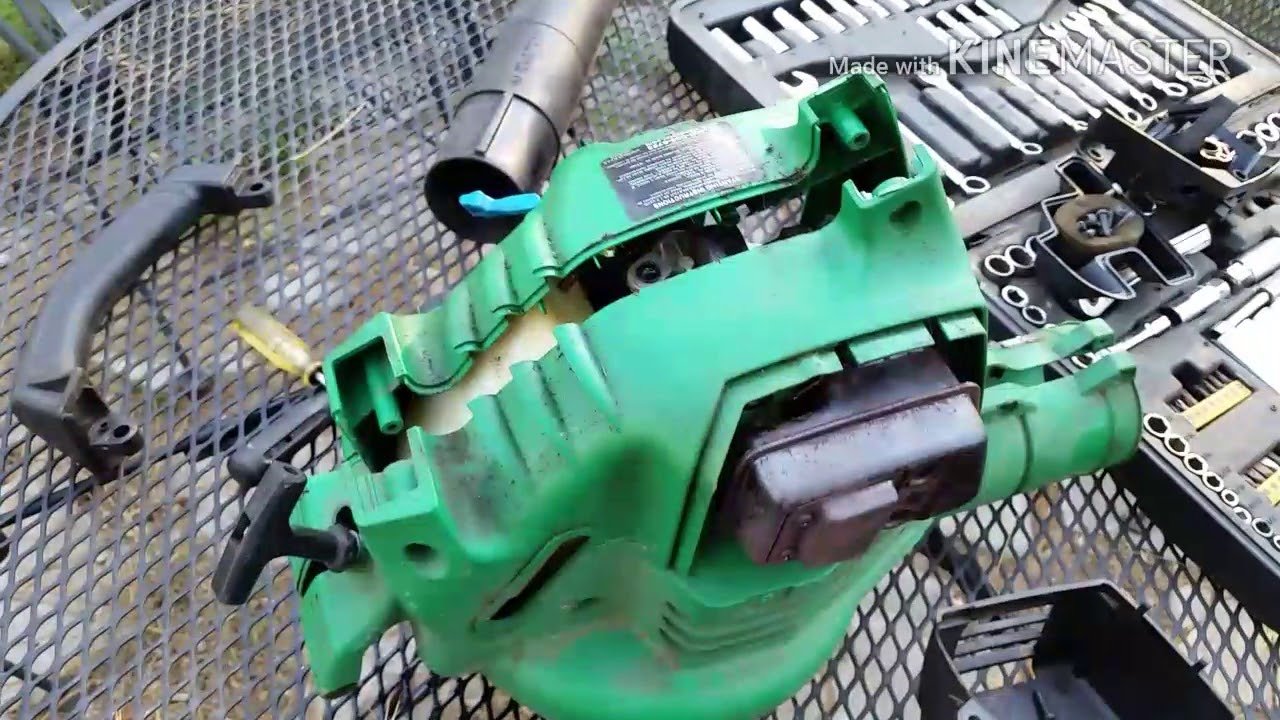
For homeowners in the United States, replacing a leaf blower fuel line is usually a small repair that takes about 20 to 45 minutes. The basic process is simple: drain the fuel, remove the old hose, install fuel-rated tubing of the correct size, restore the original routing, and check for leaks before use.
The exact hose size, fuel filter, grommet, and routing depend on the leaf blower model. Always check the owner’s manual or parts diagram before buying replacement parts.
Why a Leaf Blower Fuel Line Fails
A fuel line carries gasoline from the tank to the carburetor. Some leaf blowers also use a second line to return fuel to the tank through the primer bulb system.
Fuel lines can become hard, cracked, soft, swollen, or brittle over time. Gasoline, heat, vibration, and fuel additives can all shorten hose life. A damaged line may cause:
- A gasoline smell
- Fuel leaking near the tank or carburetor
- Hard starting
- An engine that starts and then stops
- A primer bulb that will not fill
- Air bubbles in the fuel line
- Poor engine performance
- Fuel dripping from the blower
A small crack can let air enter the fuel system even when fuel is not visibly leaking. This can make the engine act as if the carburetor or ignition system has failed.

What You Need Before Starting
Gather the correct parts and tools before opening the fuel system. This keeps the repair short and reduces the chance of contamination.
Parts
You may need:
- Fuel-resistant replacement hose
- A new in-tank fuel filter
- A new fuel tank grommet
- A replacement primer bulb
- Correct clamps, if the original design uses them
Use tubing made for gasoline and two-cycle fuel. Do not use ordinary clear vinyl tubing, aquarium hose, or generic rubber hose. These materials may soften, split, or fail when exposed to fuel.
The replacement line must fit both the tank opening and the carburetor fitting. A hose that is too loose can leak. A hose that is too tight can restrict fuel flow or damage a fitting.
Tools
Most repairs need:
- Phillips or flat-head screwdriver
- Needle-nose pliers
- Hemostat or long-nose pliers
- Small pick or hook tool
- Side cutters
- Clean shop towels
- A small fuel-safe container
- Flashlight
- Safety glasses
- Fuel-resistant gloves
A short length of stiff wire can help pull a fuel line through a small tank opening. Bend the wire into a smooth hook. Cover any sharp end so it does not puncture the hose or damage the tank.
Safety setup
Work outdoors or in a well-ventilated area away from buildings. Keep the blower away from:
- Open flames
- Pilot lights
- Gas water heaters
- Space heaters
- Cigarettes
- Sparks
- Hot engines
- Electrical tools that may create sparks
Let the engine cool fully. Gasoline vapors can travel along the ground and ignite at a distance.

Step 1: Identify the Fuel Lines and Record Their Routing
Before removing anything, take clear photos of the fuel tank, primer bulb, carburetor, and hose routing.
Many small two-cycle engines have two fuel lines:
- A supply line that carries fuel from the tank to the carburetor.
- A return line that carries excess fuel back to the tank.
The supply line often connects to an in-tank fuel filter. The return line may end inside the tank without a filter. However, this is not universal. Some designs route the primer bulb differently.
Do not rely on hose color alone. Colors vary by brand and model. Trace each line from one end to the other.
Write down:
- Which tank opening each hose uses
- Which carburetor fitting each hose reaches
- Whether a fuel filter is attached
- How the hoses pass around the air filter, throttle cable, and muffler
- Where clamps or retainers are located
- Which side of the primer bulb each line connects to
Correct routing matters. A hose that touches the muffler can melt. A hose trapped under the air filter housing can kink and stop fuel flow.

Step 2: Drain the Fuel Tank
Drain the tank before removing the fuel line.
- Place the blower on a stable, level surface.
- Remove the fuel cap slowly.
- Pour the fuel into an approved fuel container.
- Use a hand siphon if the tank opening makes draining difficult.
- Press the primer bulb several times if the manual permits it.
- Catch any remaining fuel in a small container or towel.
Do not drain gasoline into soil, a storm drain, or household plumbing. Contact your local household hazardous waste program or recycling center for disposal guidance.
If the fuel is old, cloudy, contaminated, or mixed with water, do not return it to the blower. Old fuel can damage the carburetor and may cause a separate starting problem.
After draining, leave the fuel cap off for a short time so vapors can disperse. Do not use compressed air to blow fuel vapors toward an ignition source.
Step 3: Remove Covers That Block Access
Remove only the covers needed to reach the fuel line.
Depending on the blower, you may need to remove:
- The air filter cover
- The air filter
- The starter housing
- A side cover
- The carburetor cover
- The engine shroud
Place screws in a small container. Some screws look alike but have different lengths. Mixing them can damage plastic housings or internal parts during reassembly.
Keep dirt away from the carburetor opening. If you remove the air filter or carburetor, cover exposed openings with a clean, lint-free cloth. Do not push debris into the intake.

Step 4: Remove the Old Fuel Line
Remove the old line carefully. Do not pull hard on a plastic carburetor fitting.
At the carburetor
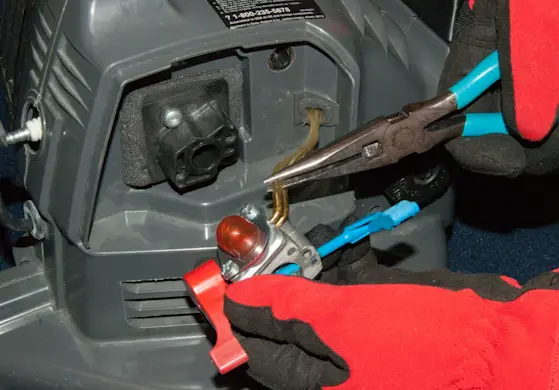
Use needle-nose pliers to grip the hose, not the fitting. Twist the hose gently while pulling it away from the carburetor.
If the hose has hardened onto the fitting, cut a shallow slit along the hose with a sharp blade. Cut away from the fitting and your fingers. Do not cut deep enough to score the brass or plastic nipple.
If the hose will not move, replace the fitting or carburetor component rather than forcing it. A broken fitting can turn a simple hose repair into a carburetor replacement.
At the fuel tank
Many fuel lines pass through a rubber grommet in the tank. Others connect through a molded tank outlet.
For a grommet-style tank:
- Remove the tank if the design allows it.
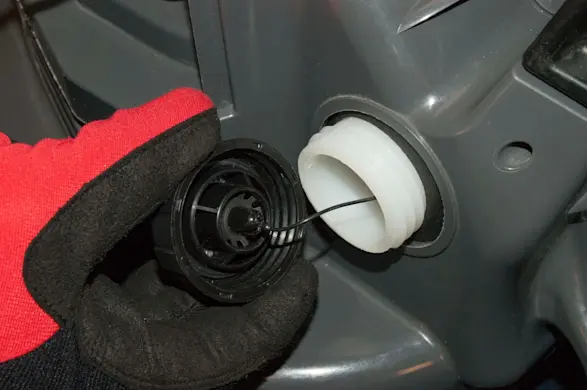
- Use a hook tool or long-nose pliers to pull the hose and filter through the filler opening.
- Remove the old hose from the grommet.
- Inspect the grommet for cracks or hardening.
If the grommet is damaged, replace it. A new hose will not seal correctly through a failed grommet.
Do not use a metal screwdriver to pry aggressively against a plastic fuel tank. The tank may crack or develop a leak.

Step 5: Measure and Prepare the New Hose
Match the new hose to the original line before cutting it.
Check:
- Inside diameter
- Outside diameter
- Wall thickness
- Flexibility
- Fuel compatibility
- Length
The inside diameter must fit the carburetor and tank connections. The outside diameter must pass through the tank grommet without falling out or tearing the seal.
Cut the hose slightly longer than the old line if the original was stretched, kinked, or difficult to route. Do not leave a large loop inside the tank or near the engine. Excess hose can fold and restrict fuel flow.
For a line with a tank filter, attach the filter to the hose before inserting it into the tank. The filter should sit near the bottom of the tank but must still move freely. It should not be wedged against a tank wall.
A short, blunt taper on the hose end can make installation easier. Do not use oil or petroleum grease on the hose. If lubrication is needed, use a small amount of fuel-compatible lubricant approved for the hose material.

Step 6: Install the New Fuel Line
Install the hose in the same path as the original.
Installing a tank-to-carburetor line
- Feed the hose through the tank grommet or tank opening.
- Pull enough hose into the tank to attach the fuel filter.
- Confirm that the filter can move inside the tank.
- Route the outside portion toward the carburetor.
- Push the hose fully onto the correct carburetor fitting.
- Secure it with the original clamp, if one was used.
- Check that the hose is not kinked or stretched.
A hose connection should be fully seated on the fitting. If the hose slips off with light pressure, it may be the wrong size or may need a clamp.
Installing a return line
If the blower uses a return line, connect it to the correct tank port and primer bulb or carburetor fitting. Do not guess based on position alone.
The primer bulb usually has an inlet and outlet. The correct arrangement depends on the engine design. Follow the model’s fuel-system diagram when available.
If you reverse the lines, the primer bulb may remain empty, the blower may fail to start, or fuel may not reach the carburetor.

Step 7: Reconnect the Primer Bulb and Reassemble the Blower
Inspect the primer bulb while the fuel lines are accessible. Replace it if it is:
- Cracked
- Cloudy
- Soft
- Collapsed
- Stiff
- Leaking around its base
A new fuel line will not solve a failed primer bulb.
Reconnect each hose to the same fitting shown in your photos or manual. Make sure no hose touches the muffler, cylinder, or other hot part. Use the original clips and guides to hold the hoses in place.
Reinstall the covers, air filter, and fuel cap. Do not overtighten screws in plastic. Tighten them until snug.
Before adding fuel, move the throttle and choke controls. Confirm that no cable pinches a fuel line. Check that the air filter is seated correctly.
Step 8: Add Fresh Fuel and Check for Leaks
Use the fuel mixture specified by the manufacturer. Many handheld two-cycle blowers require gasoline mixed with two-cycle oil. The oil ratio is not universal, so check the owner’s manual or the label on the equipment.
Add only a small amount of fuel for the first test.
Inspect the tank, grommet, fuel filter, carburetor fittings, primer bulb, and hose connections. Look for wet spots or a strong fuel odor.
Press the primer bulb several times if the manual instructs you to do so. The bulb should begin to fill with fuel. Stop if fuel appears outside the hose or around a fitting.
Start the blower outdoors. Let it run briefly at idle, then observe the lines and connections. Stop the engine at once if you see:
- A fuel leak
- Fuel spraying or dripping
- A strong gasoline smell
- Smoke from spilled fuel
- A hose touching a hot engine part
- An engine that races unexpectedly
Do not test a gasoline leaf blower inside a garage, shed, basement, or other enclosed area. Carbon monoxide from the exhaust can build up quickly.

How to Tell Whether the Repair Worked
The repair is likely successful when:
- The primer bulb fills as designed
- The engine starts using the normal procedure
- The blower idles without stalling
- The engine responds to the throttle
- No fuel leaks appear
- The hose stays in place
- The engine does not surge from an air leak
- The fuel line remains away from hot parts
Let the blower cool, then inspect the connections again. Some leaks appear only after the hose and fittings warm up.
A successful repair does not always fix a blower that still will not start. Old fuel, a blocked carburetor, a damaged ignition coil, a stuck choke, or low compression may cause the same symptom.

Troubleshooting After Replacing the Fuel Line
Use the symptom to guide the next check. Avoid replacing the carburetor before checking the simple causes.
| Symptom | Likely causes | First checks |
|---|---|---|
| Primer bulb stays empty | Reversed lines, blocked filter, air leak, failed bulb | Check routing, filter, bulb, and tank grommet |
| Fuel leaks from the tank | Split hose, loose grommet, wrong hose size | Inspect the tank connection and grommet |
| Engine starts and stops | Kinked hose, blocked filter, stale fuel, carburetor blockage | Check hose flow and use fresh fuel |
| Engine will not start | Wrong line routing, no fuel delivery, flooded engine, ignition fault | Verify the manual’s starting steps and fuel path |
| Fuel drips from the carburetor | Needle valve problem, flooded carburetor, incorrect line connection | Stop using the blower and inspect the carburetor |
| Hose slips off | Wrong inside diameter, hardened hose end, missing clamp | Install the correct fuel-rated hose |
| New hose melts or softens | Wrong material or contact with heat | Replace it and correct the routing immediately |
If the primer bulb collapses after pressing it, a hose may be blocked or the tank vent may be restricted. Open the fuel cap briefly as a diagnostic check. If the problem changes, inspect the cap and tank vent. Do not operate the blower with a missing or improperly sealed fuel cap.

Common Mistakes to Avoid
Using the wrong hose
Clear plastic tubing may look suitable but may not resist gasoline. Use hose sold for small-engine fuel systems.
Guessing the line connections
Two hoses can look identical but serve different functions. Photograph the original layout and follow the manufacturer’s diagram.
Installing the fuel filter backward
Many small-engine filters have a flow arrow. If one is present, point it from the fuel tank toward the carburetor. Some filters do not have a marked direction, so follow the part instructions.
Making the hose too short
A short hose can pull on a fitting or prevent the filter from reaching fuel at the bottom of the tank.
Leaving the hose too long
A loose loop can kink, rub against the flywheel, or touch the muffler.
Reusing a damaged grommet
A hard or cracked grommet can leak even when the new hose is correct.
Testing near a flame
Gasoline vapors are highly flammable. Move the blower outdoors before adding fuel or starting the engine.
Assuming all fuel problems come from the hose
A new hose cannot repair a blocked carburetor, damaged primer bulb, bad spark plug, or low compression.

When to Stop and Get Professional Help
Stop the repair if the fuel tank is cracked, the carburetor fitting breaks, or fuel continues to leak after the hose and grommet are replaced.
Professional service is also sensible when:
- The model uses a complex fuel system
- The tank has hidden internal fittings
- The fuel line passes through a sealed tank wall
- You cannot identify the correct hose routing
- The engine has been flooded repeatedly
- The blower has a strong fuel leak
- The engine runs only with the choke partly closed
- You suspect a carburetor or compression problem
A leaking fuel tank is not a safe “keep using it” problem. Replace the tank or have the blower repaired before operation.

Frequently Asked Questions
Can I replace a leaf blower fuel line without removing the fuel tank?
Often, yes. Some tanks provide enough access through the fuel filler neck. Other models require partial disassembly or tank removal. Follow the model-specific service instructions rather than forcing the hose through a narrow opening.
How do I know which fuel line goes to the carburetor?
Trace the old hose before removal. A supply line commonly runs from the tank filter to the carburetor. A return line usually runs from the primer bulb or carburetor system back to the tank. Because layouts differ, the owner’s manual is the final reference.
Should I replace the fuel filter at the same time?
Replace it if it is dirty, clogged, damaged, or several years old. Since the filter is already accessible during the hose repair, changing it can prevent a restricted fuel flow problem.
Why does my leaf blower still not start after replacing the fuel line?
Check the line routing, filter position, primer bulb, fuel freshness, spark plug, choke setting, and carburetor. If the engine starts briefly and dies, fuel delivery or carburetor blockage is more likely than an ignition problem.
Can I use fuel-line clamps on a leaf blower?
Use clamps only when the original design calls for them or when the replacement hose does not seal securely on the fitting. Do not overtighten a clamp on a small plastic fitting. It can crack the fitting or cut the hose.
Final Checklist
Before returning the blower to regular use, confirm that:
- The fuel tank is free of cracks.
- The new hose is rated for gasoline and two-cycle fuel.
- The hose matches the original size.
- The supply and return lines are correctly routed.
- The fuel filter is secure.
- The grommet seals the tank opening.
- No hose touches the muffler or cylinder.
- The primer bulb works normally.
- The blower starts and runs outdoors without leaks.
- Old fuel and damaged parts are disposed of properly.
The safest next step is to find the blower’s model number and compare its fuel-system diagram with the hose routing before ordering parts. That one check prevents most installation errors.