
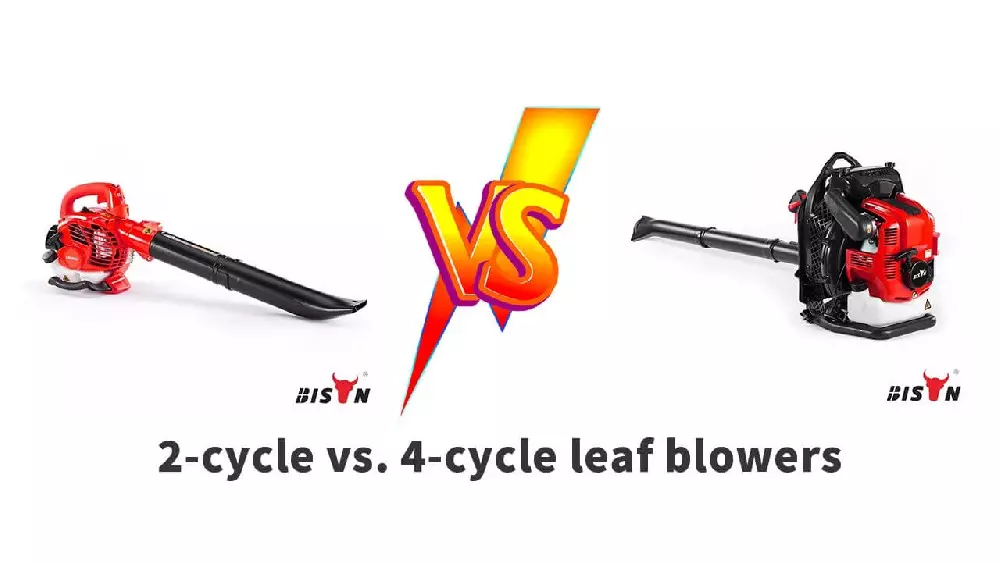
Changing the oil in a 4-cycle leaf blower is a simple task for most U.S. homeowners. It helps the engine run smoothly, reduces wear, and supports a longer service life. The full job often takes 15 to 30 minutes.
First, check the owner’s manual for the correct oil type, oil amount, drain method, and service schedule. Four-cycle engines use a separate crankcase for oil. Do not mix engine oil with gasoline unless the manual tells you to do so.

What You Need Before Changing the Oil
Gather the correct supplies before you start. Using the right oil and working on a level surface helps prevent engine damage.
You will usually need:
- The oil listed in the owner’s manual
- A small drain pan
- A funnel
- Clean shop towels or rags
- A socket or wrench, if the blower has a drain plug
- A measuring cup or oil bottle with volume marks
- Gloves and safety glasses
- A container for used oil
Many small 4-cycle engines use a small amount of oil. A standard quart bottle may hold more oil than the blower needs, so measure carefully.
Check the Manual First
Look for these details in the manual:
- Recommended oil grade, such as SAE 30 or 10W-30
- Oil capacity
- Whether the engine has a drain plug
- Whether the engine should be drained through the fill tube
- The correct oil-check position
- The first oil-change interval
- The normal service interval
Oil capacity can vary by model. Two leaf blowers with similar engine sizes may still require different amounts. Never use a general capacity estimate instead of the model’s instructions.
Confirm That It Is a 4-Cycle Engine
A 4-cycle, or 4-stroke, leaf blower has a separate oil reservoir. It normally has:
- An oil-fill cap
- A dipstick or marked fill area
- A crankcase that holds engine oil
- A separate fuel tank for gasoline
A 2-cycle leaf blower uses a gasoline-and-oil fuel mix. The oil-changing process in this guide does not apply to a 2-cycle model.
How to Change Oil in a 4-Cycle Leaf Blower
The basic process is to warm the oil, shut down the engine, drain the old oil, add the correct new oil, and check the level.
1. Prepare a Safe Work Area
Move the leaf blower outdoors or to a well-ventilated area. Place it on a flat, stable surface. Keep the blower away from open flames, sparks, cigarettes, and anything that could ignite gasoline vapors.
Turn the engine off. Let it cool enough to handle safely, but do not let it become completely cold if the manual recommends draining warm oil. Warm oil flows more easily and carries more suspended dirt out of the crankcase.
If you ran the blower to warm the oil, stop the engine before beginning the service.
2. Disconnect the Spark Plug
Remove the spark plug boot from the spark plug. This reduces the chance of an accidental start while you work near the engine.
Do not pull on the wire itself. Grip the rubber boot and twist it gently as you remove it. Keep the boot away from the spark plug during the oil change.
3. Clean Around the Oil-Fill Area
Wipe dirt and debris from around the oil cap, dipstick, and drain plug. This step matters because loose dirt can fall into the engine.
A clean area also makes it easier to see the oil level. Do not use compressed air near an open oil-fill hole unless you can prevent debris from entering the engine.
4. Remove the Oil-Fill Cap or Dipstick
Remove the oil cap or dipstick. Set it on a clean surface.
Opening the fill point allows air to enter the crankcase. This helps the old oil drain more freely. If the cap has a dipstick, wipe it clean and set it aside.
5. Drain the Old Oil
Your leaf blower may use one of two common drain methods.
Method A: Use the Drain Plug
If the engine has a drain plug:
- Place the drain pan under the plug.
- Hold the blower in the position shown in the manual.
- Loosen the drain plug with the correct wrench.
- Remove the plug by hand once it is loose.
- Let the oil drain into the pan.
- Allow several minutes for the flow to slow.
- Inspect the plug and sealing washer.
- Reinstall the plug and tighten it to the manual’s specification.
Do not overtighten the plug. Excess force can damage the threads or sealing surface.
Method B: Drain Through the Fill Tube
Some handheld leaf blowers do not have a separate drain plug. The manual may direct you to tilt the blower and drain oil through the fill opening.
If so:
- Place the drain pan beside the fill opening.
- Tilt the blower only as the manual directs.
- Keep the air filter, muffler, and carburetor side positioned correctly.
- Pour the old oil into the pan.
- Return the blower to its normal upright position.
Tilting a small engine the wrong way can send oil into the air filter, carburetor, or exhaust. That may cause smoke, hard starting, or poor running. If the manual does not clearly show the correct tilt direction, do not guess.
6. Add the Correct New Oil
Use a clean funnel and add the oil slowly. Start with less than the listed capacity. For example, if the manual lists 12 fluid ounces, add about 10 fluid ounces first, then check the level.
Wait briefly for the oil to settle. Check the dipstick according to the manual. Some dipsticks are checked fully threaded in. Others are checked with the dipstick resting on the opening without being threaded in.
Add small amounts until the oil reaches the full mark. Stop when it reaches the correct level.
Do not overfill the crankcase. Too much oil can cause smoke, leaks, foaming, poor engine operation, or damage.
7. Reinstall the Cap and Clean the Blower
Tighten the oil cap or dipstick. Wipe away any oil on the housing or engine.
Oil left on a hot muffler can smoke and may create a fire risk. Clean spills before starting the blower.
8. Reconnect the Spark Plug and Run a Brief Check
Push the spark plug boot firmly back onto the spark plug. Start the blower outdoors and let it run for a short time.
Watch for:
- Oil leaking from the drain plug
- Smoke that does not clear
- Unusual engine noise
- Oil around the fill cap
- Poor idle or stalling
Turn the engine off and let it sit for a few minutes. Check the oil level again on a level surface. Add oil only if needed.

How to Check the Oil Level Correctly
Check the oil before each use or at the interval listed in the manual. The engine should be off and positioned level unless the manufacturer gives another instruction.
A basic oil check works like this:
- Remove the dipstick.
- Wipe it clean.
- Insert it as directed by the manual.
- Remove it again.
- Read the oil level on the marked area.
The oil should sit between the low and full marks. If it is below the low mark, add the correct oil before operating the blower.
Do not judge the level by looking at the outside of the engine. The amount needed may be very small, and a small engine can be damaged by both low oil and excess oil.
What the Oil Should Look Like
Used oil often becomes dark. Dark color alone does not prove that the oil is bad. Look for more serious signs, such as:
- A strong fuel smell
- A milky or creamy appearance
- Metal particles
- Thick sludge
- An unusually high oil level
Fuel in the oil may point to a carburetor or fuel-system problem. Milky oil may indicate moisture contamination. Metal particles can signal internal wear. Stop using the blower and seek qualified repair help if you see these signs.

Choosing Oil for a 4-Cycle Leaf Blower
Use the oil grade listed by the manufacturer. Common small-engine oils include SAE 30 and 10W-30, but the correct choice depends on the engine and expected temperatures.
Some manuals allow different oil grades for different outdoor temperatures. A multi-grade oil may offer wider temperature coverage, while a single-grade oil may be listed for warmer conditions. The manual takes priority over general advice.
Oil Selection Guide
| Manual instruction | What to do |
|---|---|
| Lists one oil grade | Use that grade |
| Lists several grades by temperature | Choose the grade that matches the operating temperature |
| Allows synthetic oil | Use the approved synthetic grade if desired |
| Does not identify an oil grade | Contact the manufacturer or consult the exact manual |
| Calls for a special oil | Do not substitute without confirmation |
Do not use 2-cycle oil in the crankcase unless the manufacturer specifically approves it. Do not pour gasoline into the oil-fill opening.
When Should You Change the Oil?
The owner’s manual provides the correct service interval. Many small-engine manufacturers call for an early oil change after the first few hours of use and then regular changes based on operating time or seasonal use. The exact interval is not the same for every leaf blower.
Change the oil sooner when the blower:
- Runs in dusty conditions
- Is used for long periods
- Experiences repeated overheating
- Has fuel contamination
- Has not been serviced for a long time
- Is stored for an extended season, if the manual recommends fresh oil before storage
Track the date and engine hours after each service. If the blower has no hour meter, a simple note on the calendar can help.

Common Oil-Change Problems and Fixes
The Engine Smokes After the Oil change
A small amount of smoke may occur if oil spilled onto the muffler. Shut the engine off and let it cool. Clean the spilled oil before trying again.
Continuous white or blue smoke may mean:
- The crankcase is overfilled
- The blower was tilted the wrong way
- Oil entered the air filter or muffler
- The engine has an internal oil-control problem
Check the oil level first. If the level is too high, drain the excess. If oil soaked the air filter, replace or clean the filter according to the manual.
The Oil Will Not Drain
Old oil may drain slowly when the engine is cold. Warm the engine briefly, shut it off, and try again when it is safe.
If the drain plug will not move, use the correct tool and steady pressure. Do not round the plug with an ill-fitting wrench. Do not use excessive heat near gasoline or plastic engine parts.
If the plug is damaged or seized, have a small-engine technician remove it.
The Engine Runs Poorly After Service
Check the simple causes first:
- Confirm that the oil cap or dipstick is installed.
- Check the oil level.
- Make sure the spark plug boot is connected.
- Inspect the air filter for oil.
- Confirm that the fuel tank contains fresh, correct fuel.
- Look for oil around the muffler or carburetor.
Do not keep running the blower if it makes a knocking sound, loses power badly, or shows a low oil level.
The Drain Plug Leaks
Turn the engine off. Let it cool, then inspect the plug and sealing washer.
A leak may result from:
- A loose plug
- A damaged washer
- Cross-threaded threads
- Dirt on the sealing surface
- A cracked drain area
Do not solve a leak by applying random sealant. Use the repair method specified by the manufacturer.
How to Dispose of Used Leaf Blower Oil
Never pour used engine oil onto the ground, into a storm drain, or into household trash. Used oil can contaminate soil and water.
Pour the oil into a clean, closed container. Do not mix it with gasoline, brake fluid, solvent, or other chemicals. Take it to a local used-oil collection point, auto-parts store, service center, or household hazardous-waste program that accepts used motor oil.
Rules and services vary by state and community. Check your local government or recycling program before transport.
Keep used oil away from children, pets, food, and open flames. Clean small spills with absorbent material and dispose of the material under local rules.

Key Takeaways
- Confirm that the blower has a 4-cycle engine.
- Read the exact owner’s manual before choosing oil.
- Work outdoors or in a well-ventilated space.
- Disconnect the spark plug boot before servicing.
- Drain oil through the plug or fill tube as the manual directs.
- Add oil slowly and check the level more than once.
- Avoid overfilling.
- Check for leaks before returning the blower to service.
- Recycle used oil through an approved local program.
Frequently Asked Questions
Can I change the oil while the leaf blower is hot?
Use warm oil, not dangerously hot oil. Run the engine only long enough to warm the oil, then shut it off. Let the blower cool enough to handle safely before removing the drain plug or oil cap.
How much oil does a 4-cycle leaf blower take?
The amount depends on the engine and model. Many handheld blowers use only a small number of fluid ounces. Check the manual and fill in stages to avoid overfilling.
Can I use car oil in a 4-cycle leaf blower?
Only if the oil grade and specifications match the manufacturer’s instructions. Some automotive oils may be suitable, but the engine manual is the deciding source.
Should I change the oil before storing the leaf blower?
Follow the storage instructions in the manual. Fresh oil may be recommended before long-term storage, especially if the existing oil is dirty or contaminated. Also follow the manual’s fuel-storage instructions.
What if my leaf blower has no dipstick?
Some engines use a fill opening with a marked level or another checking method. Do not estimate the level. Find the correct manual for the model and follow its oil-check procedure.
Can I use the leaf blower without oil?
No. Running a 4-cycle engine with low or no oil can cause rapid internal damage. Check the level before starting the engine.
Conclusion
To change oil in a 4-cycle leaf blower, warm the engine slightly, shut it down, disconnect the spark plug, drain the old oil using the approved method, and add the correct oil in small amounts. Check the level carefully and inspect for leaks before use.
The next step is to locate the blower’s model number and read the oil section of its owner’s manual. That one check confirms the correct oil grade, capacity, drain position, and service interval for your specific machine.